在实际的应用场景中,经常会出现软件界面战场图大于实际窗体大小,利用QScrollArea可以为widget窗体添加滚动条,可以实现小窗体利用滚动条显示大界面需求。实现如下:
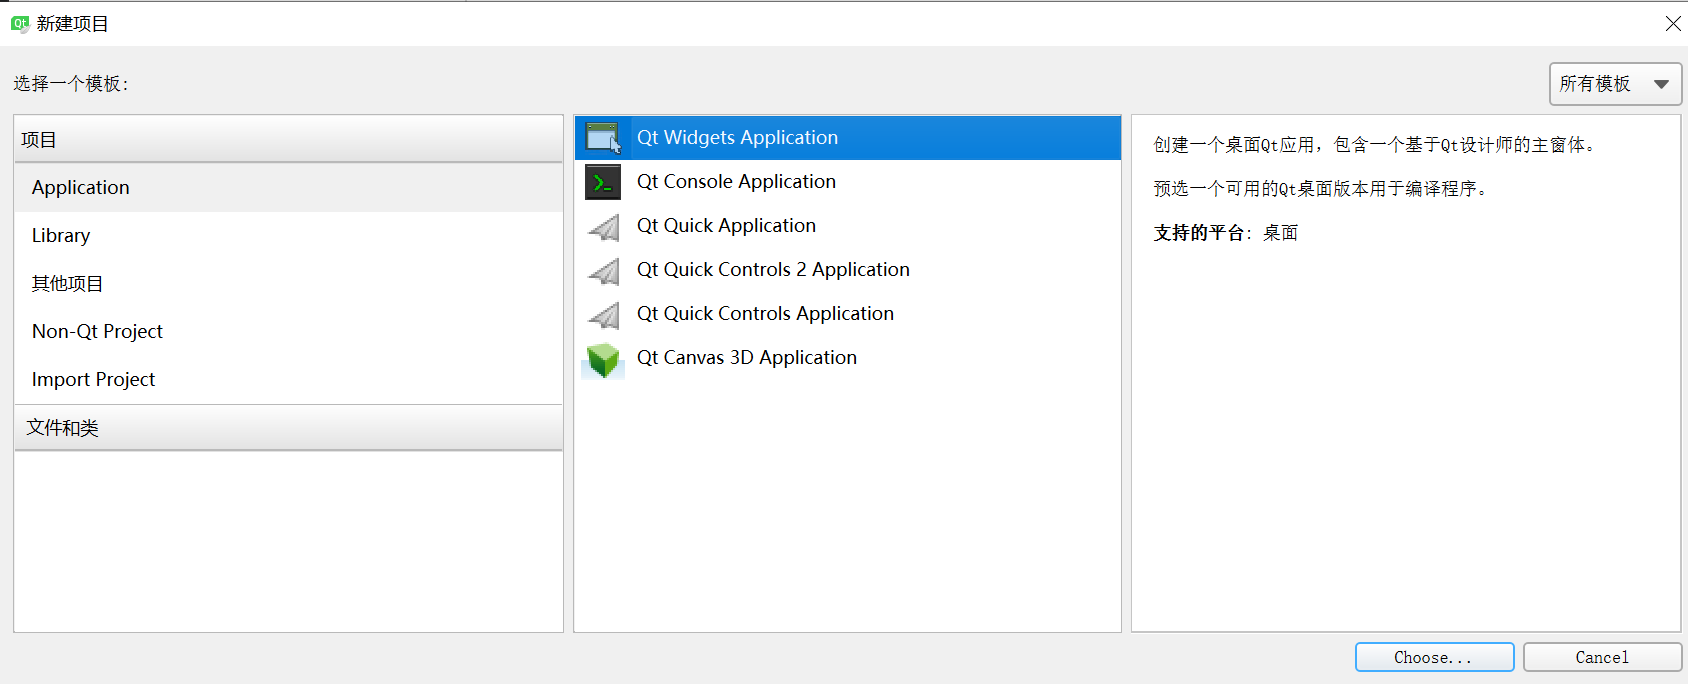
QT创建一个qWidget界面
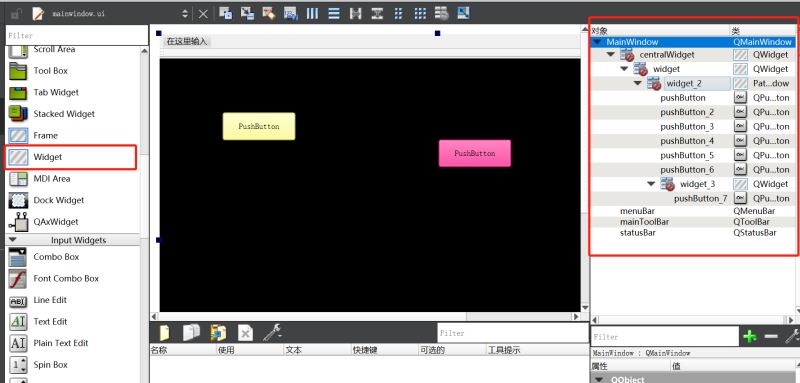
在ui界面中利用QT自带的widget控件布局一个如下图所示的层叠关系,widget_2界面大小需大于widget大小
界面布局好后,将widget_2提升为类,提升之前需为工程新添加一个设计界面类,添加完之后,将widget_2提升为类类名和前面新添加的设计界面类名一致
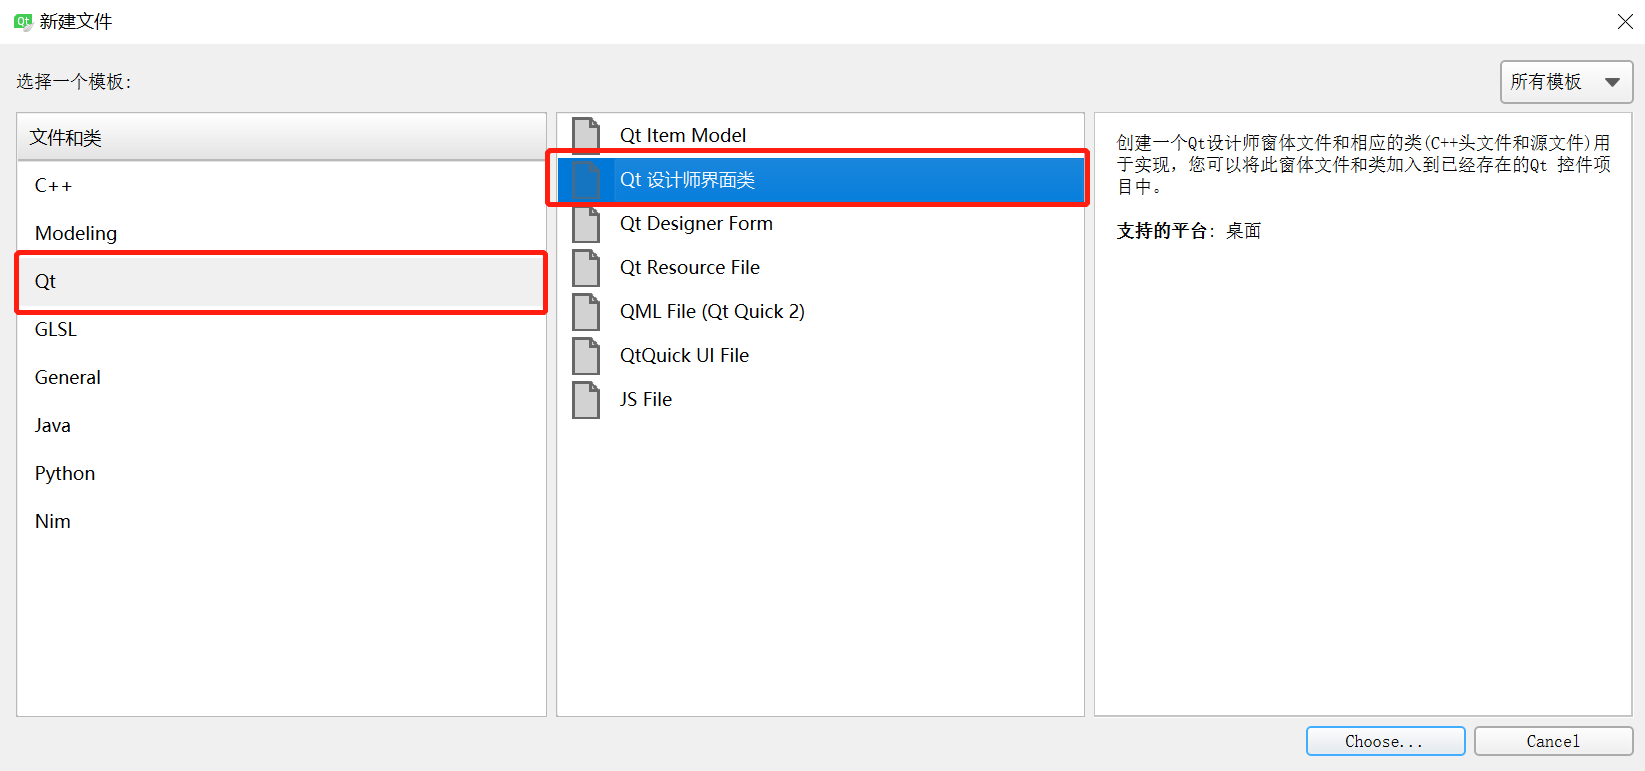
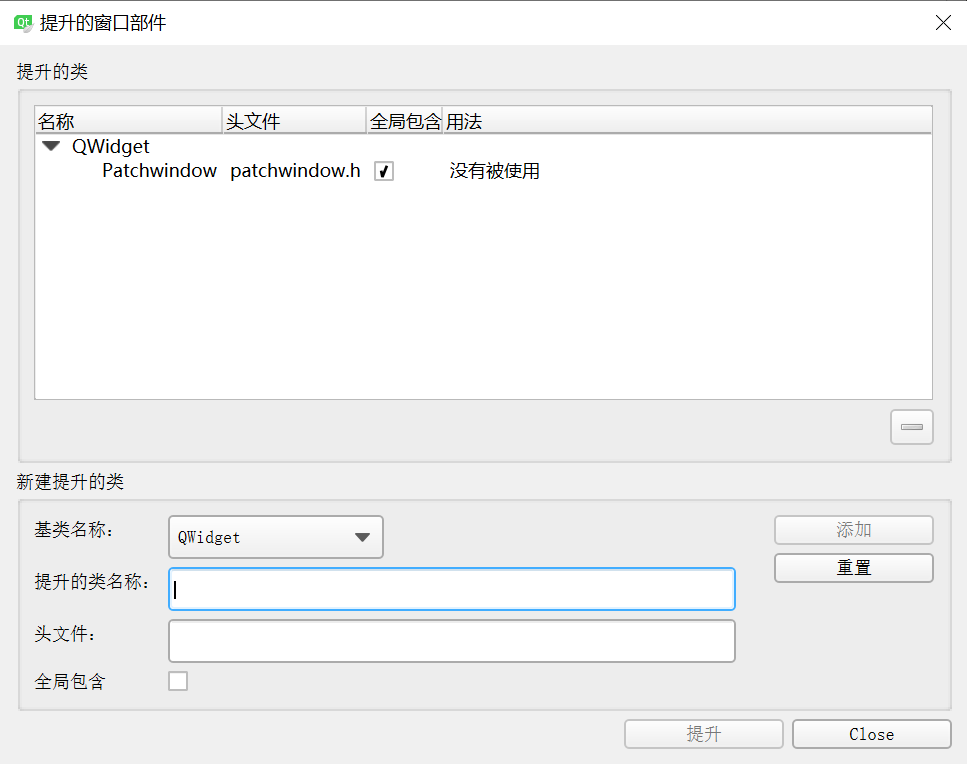
源码实现如下
patchwindow.h
#ifndef PATCHWINDOW_H
#define PATCHWINDOW_H

#include <QDebug>
#include <QPainter>
#include <QWidget>
#include <QMouseEvent>
#include <QStyleOption>
#include <QPaintEvent>

enum CursorRegion{
  NONE,
  TOPLEFT,
  TOPRIGHT,
  BOTTOMRIGHT,
  BOTTOMLEFT
};

namespace Ui {
class Patchwindow;
}

class Patchwindow : public QWidget
{
  Q_OBJECT

public:
  explicit Patchwindow(QWidget *parent = 0);
  ~Patchwindow();
  CursorRegion getCursorRegion(QPoint);

public:
  int borderWidth;
  int handleSize;

  bool mousePressed;
  QPoint previousPos;

private:
  Ui::Patchwindow *ui;

protected:
  void mousePressEvent(QMouseEvent*);
  void mouseReleaseEvent(QMouseEvent*);
  void mouseMoveEvent(QMouseEvent*);

signals:
  void send_widget_rx_ry(int rx,int ry);
};

#endif // PATCHWINDOW_H
patchwindow.cpp
#include "patchwindow.h"
#include "ui_patchwindow.h"

Patchwindow::Patchwindow(QWidget *parent) :
  QWidget(parent),
  ui(new Ui::Patchwindow)
{
  ui->setupUi(this);

  this->setMouseTracking(true);

  setFocusPolicy(Qt::StrongFocus);

  mousePressed = false;
  borderWidth = 1;
  handleSize = 8;

}

Patchwindow::~Patchwindow()
{
  delete ui;
}


//设置鼠标形状
CursorRegion Patchwindow::getCursorRegion(QPoint pos)
{
  if (pos.x() > 0 && pos.x() < (handleSize + borderWidth) &&
      pos.y() > 0 && pos.y() < (handleSize + borderWidth)  ){
      if (this->hasFocus())
          this->setCursor(QCursor(Qt::SizeFDiagCursor));
      return CursorRegion::TOPLEFT;
  }

  if (pos.x() > (this->width() - handleSize - borderWidth) && pos.x() < this->width() &&
      pos.y() > 0 && pos.y() < (handleSize + borderWidth)  ){
      if (this->hasFocus())
          this->setCursor(QCursor(Qt::SizeBDiagCursor));
      return CursorRegion::TOPRIGHT;
  }

  if (pos.x() > (this->width() - handleSize - borderWidth) && pos.x() < this->width() &&
      pos.y() > (this->height() - handleSize - borderWidth) && pos.y() < this->height()  ){
      if (this->hasFocus())
          this->setCursor(QCursor(Qt::SizeFDiagCursor));
      return CursorRegion::BOTTOMRIGHT;
  }


  if (pos.x() > 0 && pos.x() < (handleSize + borderWidth) &&
      pos.y() > (this->height() - handleSize - borderWidth) && pos.y() < this->height()  ){
      if (this->hasFocus())
          this->setCursor(QCursor(Qt::SizeBDiagCursor));
      return CursorRegion::BOTTOMLEFT;
  }

  this->setCursor(Qt::ArrowCursor);
  return CursorRegion::NONE;
}

void Patchwindow::mousePressEvent(QMouseEvent *event)
{
  mousePressed = true;
  previousPos = this->mapToParent(event->pos());
  //qDebug()<<"previousPos = "<<previousPos;
}

void Patchwindow::mouseReleaseEvent(QMouseEvent*)
{
  mousePressed = false;
}

void Patchwindow::mouseMoveEvent(QMouseEvent *event)
{
  if (mousePressed){
      QPoint _curPos = this->mapToParent(event->pos());
      QPoint _offPos = _curPos - previousPos;
      previousPos = _curPos;
      //qDebug()<<"_offPos = "<<_offPos;
      //qDebug()<<"_curPos = "<<_curPos;
      emit send_widget_rx_ry(_offPos.rx(),_offPos.ry());
  }
}
mainwindow.h
#ifndef MAINWINDOW_H
#define MAINWINDOW_H

#include <QMainWindow>
#include <QHBoxLayout>
#include <QDebug>
#include <QScrollArea>


namespace Ui {
class MainWindow;
}

class MainWindow : public QMainWindow
{
  Q_OBJECT

public:
  explicit MainWindow(QWidget *parent = 0);
  ~MainWindow();

  QScrollArea *m_pScroll;


private:
  Ui::MainWindow *ui;

private slots:
  void remove_widget(int r_x,int r_y);


};

#endif // MAINWINDOW_H
mainwindow.cpp
#include "mainwindow.h"
#include "ui_mainwindow.h"
#include <QPalette>

#include <QScrollBar>

MainWindow::MainWindow(QWidget *parent) :
  QMainWindow(parent),
  ui(new Ui::MainWindow)
{
  ui->setupUi(this);
  //this->resize(600,600);

  //给父窗体填充颜色
  QPalette palette = ui->widget_2->palette();
  palette.setBrush(QPalette::Window,QBrush(QColor(61,61,61)));
  ui->widget_2->setAutoFillBackground(true);
  ui->widget_2->setPalette(palette);

  ui->widget_2->setAttribute(Qt::WA_StyledBackground);
  ui->widget_2->setStyleSheet("QWidget{background: black}");

  ui->widget_3->setAttribute(Qt::WA_TransparentForMouseEvents, true);//设置该层鼠标事件透明,可以设置为显示层

  m_pScroll = new QScrollArea(ui->widget);
  m_pScroll->setWidget(ui->widget_2);//给widget_2设置滚动条
  //ui->widget_2->setMinimumSize(1500,1000);//这里注意,要比主窗体的尺寸要大,不然太小的话会留下一片空白

  QHBoxLayout *pLayout = new QHBoxLayout;
  pLayout->addWidget(m_pScroll);
  pLayout->setMargin(0);
  pLayout->setSpacing(0);
  ui->widget->setLayout(pLayout);

  connect(ui->widget_2,&Patchwindow::send_widget_rx_ry,this,&MainWindow::remove_widget);

}

MainWindow::~MainWindow()
{
  delete ui;
}

void MainWindow::remove_widget(int r_x,int r_y)
{
  r_y = m_pScroll->verticalScrollBar()->value()-r_y;
  r_x = m_pScroll->horizontalScrollBar()->value()-r_x;

  if((0 < r_y) | (r_y == 0))
  {
      if(r_y > m_pScroll->verticalScrollBar()->maximum())
      {
          r_y = m_pScroll->verticalScrollBar()->maximum();
      }
  }
  else
  {
      r_y = 0;
  }

  if((0 < r_x) | (r_x == 0))
  {
      if(r_x > m_pScroll->horizontalScrollBar()->maximum())
      {
          r_x = m_pScroll->horizontalScrollBar()->maximum();
      }
  }
  else
  {
      r_x = 0;
  }

  m_pScroll->verticalScrollBar()->setValue(r_y);
  m_pScroll->horizontalScrollBar()->setValue(r_x);

}
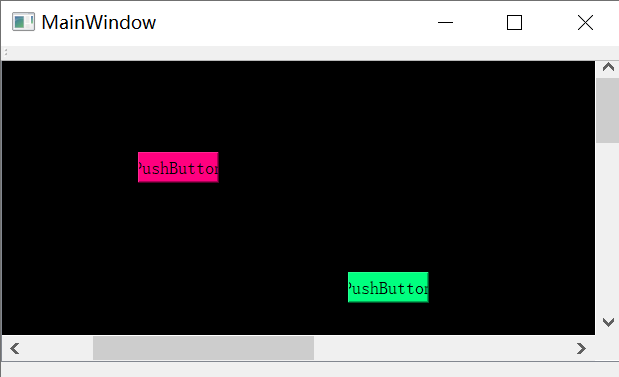
最终实现效果如下,可以通过滚轮滚动界面,也可以通过鼠标拖拽来实现界面拖拽效果:
到此这篇关于Qt基于QScrollArea实现界面嵌套移动的文章就介绍到这了,更多相关Qt QScrollArea界面嵌套移动内容请搜索服务器之家以前的文章或继续浏览下面的相关文章希望大家以后多多支持服务器之家!
原文链接:https://www.cnblogs.com/xionglaichuangyichuang/p/16363022.html

