springboot http转https
一、安全证书的生成
可以使用jdk自带的证书生成工具,jdk自带一个叫keytool的证书管理工具,可以用它来实现签名的证书。
1、进入cmd命令控制终端
2、生成一个证书
别名:alias = tomcat
密码:keypass = 123456
生成位置:keystore = D:/keys
keys文件夹需要自己先创建好
cmd命令:
keytool -genkey -alias tomcat -keypass 123456 -keyalg RSA -keysize 1024 -validity 365 -keystore D:/keys/tomcat.keystore -storepass 123456
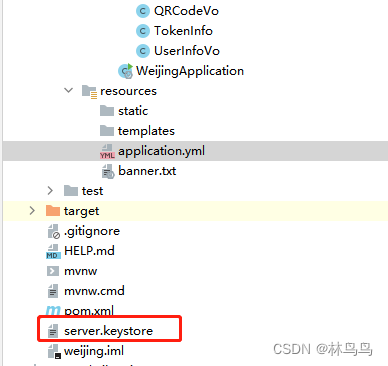
3、获取tomcat.keystore文件,放入项目根目录下面

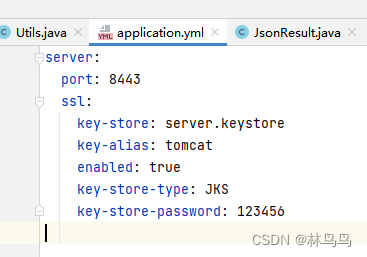
二,配置yml文件
|
1
2
3
4
5
6
7
8
|
server: port: 8443 ssl: key-store: server.keystore key-alias: tomcat enabled: true key-store-type: JKS key-store-password: 123456 |

三、springbootApplication启动类配置
|
1
2
3
4
5
6
7
8
9
10
11
12
13
14
15
16
17
18
19
20
21
22
23
24
25
26
27
28
29
30
31
32
33
34
35
36
37
38
39
40
41
|
import org.apache.catalina.Context;import org.apache.catalina.connector.Connector;import org.apache.tomcat.util.descriptor.web.SecurityCollection;import org.apache.tomcat.util.descriptor.web.SecurityConstraint;import org.springframework.boot.SpringApplication;import org.springframework.boot.autoconfigure.SpringBootApplication;import org.springframework.boot.web.embedded.tomcat.TomcatServletWebServerFactory;import org.springframework.boot.web.servlet.server.ServletWebServerFactory;import org.springframework.context.annotation.Bean; @SpringBootApplicationpublic class WeijingApplication { public static void main(String[] args) { SpringApplication.run(WeijingApplication.class, args); } @Bean public ServletWebServerFactory servletContainer() { TomcatServletWebServerFactory tomcat = new TomcatServletWebServerFactory() { @Override protected void postProcessContext(Context context) { SecurityConstraint securityConstraint = new SecurityConstraint(); securityConstraint.setUserConstraint("CONFIDENTIAL"); SecurityCollection collection = new SecurityCollection(); collection.addPattern("/*"); securityConstraint.addCollection(collection); context.addConstraint(securityConstraint); } }; tomcat.addAdditionalTomcatConnectors(redirectConnector()); return tomcat; } private Connector redirectConnector() { Connector connector = new Connector("org.apache.coyote.http11.Http11NioProtocol"); connector.setScheme("http"); connector.setPort(8080); connector.setSecure(false); connector.setRedirectPort(8443); return connector; } |
启动成功
另外:springboot2.xx版本以上可以用上面的方法 如果2.xx以下的 就要换成
EmbeddedServletContainerFactory
|
1
2
3
4
5
6
7
8
9
10
11
12
13
14
15
16
17
18
19
20
21
22
23
24
25
26
27
28
29
30
31
32
33
34
35
36
37
38
39
40
41
42
|
import org.apache.catalina.Context;import org.apache.catalina.connector.Connector;import org.apache.tomcat.util.descriptor.web.SecurityCollection;import org.apache.tomcat.util.descriptor.web.SecurityConstraint;import org.springframework.boot.SpringApplication;import org.springframework.boot.autoconfigure.SpringBootApplication;import org.springframework.context.annotation.Bean; @SpringBootApplicationpublic class WeijingApplication { public static void main(String[] args) { SpringApplication.run(WeijingApplication.class, args); } @Bean public EmbeddedServletContainerFactory servletContainer() { TomcatEmbeddedServletContainerFactory tomcat = new TomcatEmbeddedServletContainerFactory() { @Override protected void postProcessContext(Context context) { SecurityConstraint constraint = new SecurityConstraint(); constraint.setUserConstraint("CONFIDENTIAL"); SecurityCollection collection = new SecurityCollection(); collection.addPattern("/*"); constraint.addCollection(collection); context.addConstraint(constraint); } }; tomcat.addAdditionalTomcatConnectors(httpConnector()); return tomcat; } @Bean public Connector httpConnector() { Connector connector = new Connector("org.apache.coyote.http11.Http11NioProtocol"); connector.setScheme("http"); //Connector监听的http的端口号 connector.setPort(8080); connector.setSecure(false); //监听到http的端口号后转向到的https的端口号 connector.setRedirectPort(8443); return connector; } |
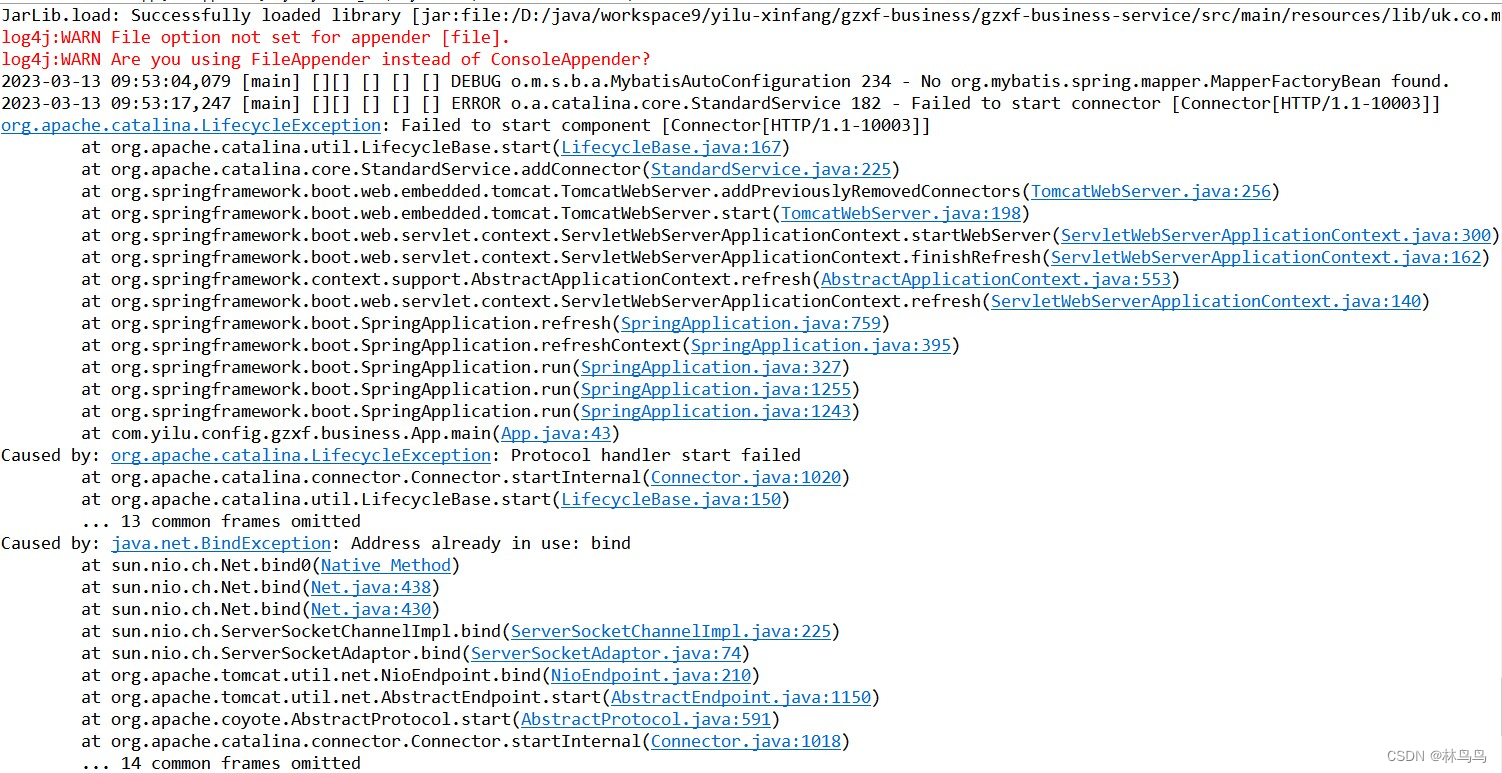
另外:报错端口被占用的话可以看下这个

报错是因为不能读取配置文件的端口,那个端口是要被用的
部署到Linux服务器 https启动失败报错 原因:
部署到服务器的时候 需要用再linux服务器上面 重新用Linux的JDK生成证书 (不能用windows生成的证书) 并放再固定的文件夹位置
更改yml文件配置

更改成服务器文件夹路径:/usr/local/xxx/server.keystore
到此这篇关于springboot如何将http转https的文章就介绍到这了,更多相关springboot http转https内容请搜索服务器之家以前的文章或继续浏览下面的相关文章希望大家以后多多支持服务器之家!
原文链接:https://blog.csdn.net/weixin_57205390/article/details/129485622


