更新到3.5版本后,格式化布局文件代码,会自动给排序元素,导致界面布局错乱
解决办法:
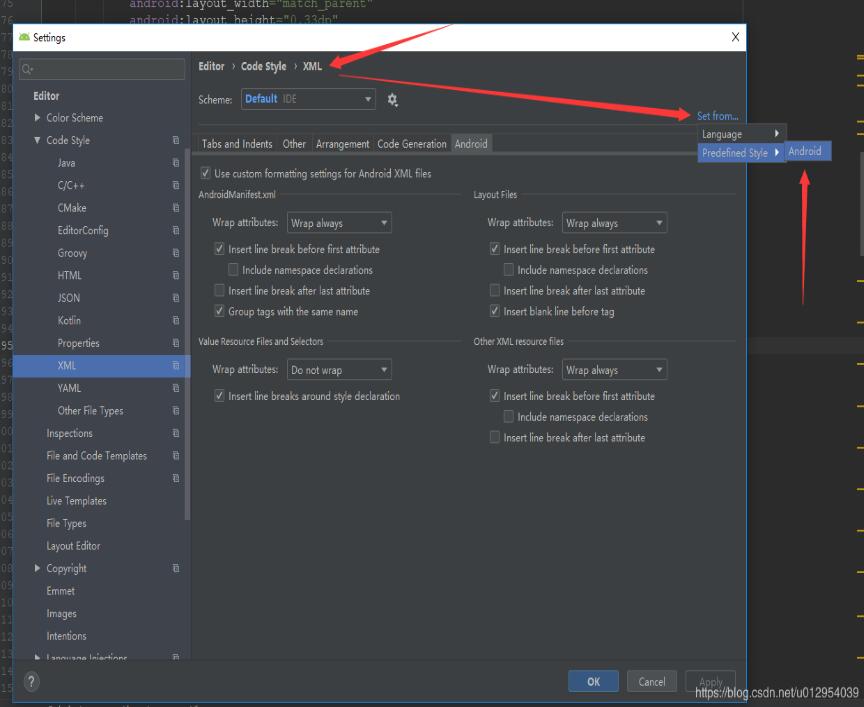
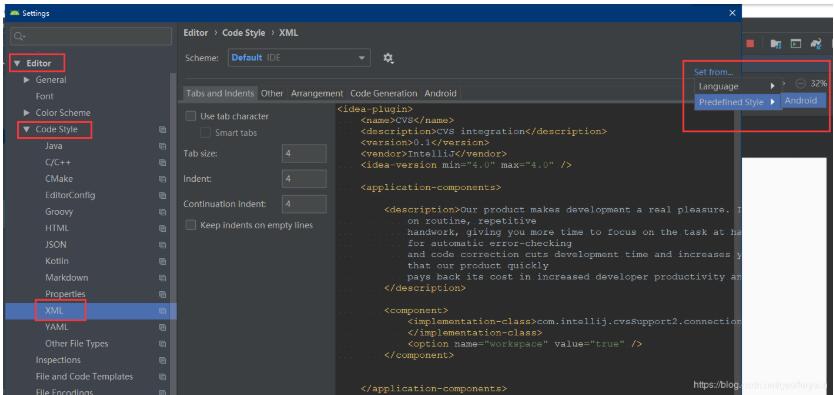
设置 > code style > XML 右上角 Set from然后选择Predefined Style...>Android即可
补充知识:Android Studio:Reformat Code格式化Xml布局代码后控件顺序错乱
Android Studio升级3.5之后,遇到个奇葩问题,在布局xml文件中格式化代码后,控件的顺序都变了,这不是我们想要的结果,网上搜了一下,确实是AS3.5的锅,每次升级都会遇到不同的问题,先记录一下吧,以后有时间再研究为什么做的调整。
|
1
2
3
4
5
6
7
8
9
10
11
12
13
14
15
16
17
18
19
20
21
22
23
24
25
26
27
28
29
30
31
32
33
34
35
|
<?xml version="1.0" encoding="utf-8"?><LinearLayout xmlns:android="http://schemas.android.com/apk/res/android" xmlns:tools="http://schemas.android.com/tools" android:layout_width="match_parent" android:layout_height="match_parent" android:orientation="vertical" android:padding="16dp" tools:context="sun.geoffery.mvpdemo.MainActivity"> <TextView android:id="@+id/text" android:layout_width="match_parent" android:layout_height="0dp" android:layout_weight="1" android:text="点击按钮获取网络数据" /> <Button android:id="@+id/getData" android:layout_width="match_parent" android:layout_height="wrap_content" android:text="获取数据【成功】" /> <Button android:id="@+id/getDataForFailure" android:layout_width="match_parent" android:layout_height="wrap_content" android:text="获取数据【失败】" /> <Button android:id="@+id/getDataForError" android:layout_width="match_parent" android:layout_height="wrap_content" android:text="获取数据【异常】" /></LinearLayout> |
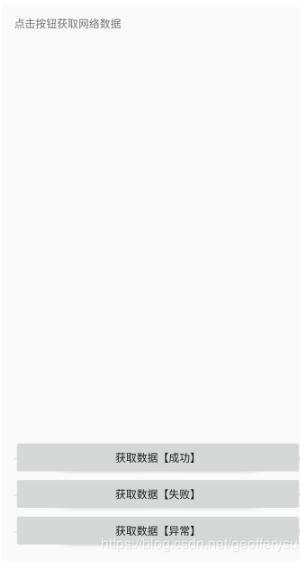
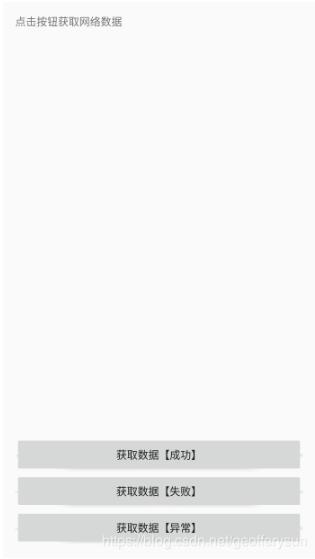
这个简单的布局界面大致如下图所示:
走你,Ctrl+Shift+F,格式化一把,再看我们的代码:
|
1
2
3
4
5
6
7
8
9
10
11
12
13
14
15
16
17
18
19
20
21
22
23
24
25
26
27
28
29
30
31
32
33
34
35
|
<?xml version="1.0" encoding="utf-8"?><LinearLayout xmlns:android="http://schemas.android.com/apk/res/android" xmlns:tools="http://schemas.android.com/tools" android:layout_width="match_parent" android:layout_height="match_parent" android:orientation="vertical" android:padding="16dp" tools:context="sun.geoffery.mvpdemo.MainActivity"> <Button android:id="@+id/getData" android:layout_width="match_parent" android:layout_height="wrap_content" android:text="获取数据【成功】" /> <Button android:id="@+id/getDataForFailure" android:layout_width="match_parent" android:layout_height="wrap_content" android:text="获取数据【失败】" /> <Button android:id="@+id/getDataForError" android:layout_width="match_parent" android:layout_height="wrap_content" android:text="获取数据【异常】" /> <TextView android:id="@+id/text" android:layout_width="match_parent" android:layout_height="0dp" android:layout_weight="1" android:text="点击按钮获取网络数据" /></LinearLayout> |
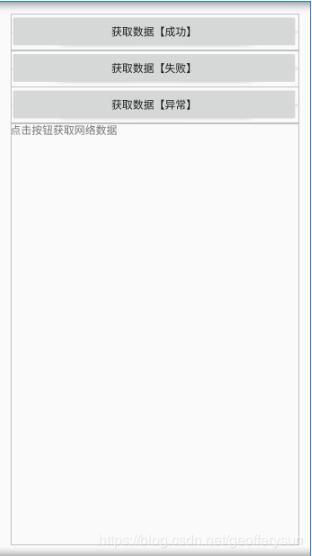
原本最顶部的TextView被格式化到了最下面,一脸懵逼,界面如下:
具体解决方法如下:
Settings–>Editor–> Code Style–>XML
点击右上角的Set from->Predefined Style选择Android后点击OK保存,Perfect!
再格式化代码,就是我们想要的效果了
以上这篇Android Studio 3.5格式化布局代码时错位、错乱bug的解决就是小编分享给大家的全部内容了,希望能给大家一个参考,也希望大家多多支持服务器之家。
原文链接:https://blog.csdn.net/u012954039/article/details/100007738


