一、概述

本质三件事:
- 租个服务器(含公网ip) + 配置项目运行所需环境
- 代码上传服务器
- 程序运行起来
二、购买服务器

1、简单介绍
在阿里云、腾讯云或者其他平台购买一台服务器。
本文以 阿里云 + centos 7.9操作系统来进行操作。
根据需要为服务器选择合适的:CPU内核数量、内存大小、磁盘大小、带宽大小…
同时为该服务器设置登录的用户名和密码,后期登录该服务器。同时获得一个公网ip,用于连接该服务器。
2、为什么使用Linux系统
- Windows系统:收费 + 图形化界面慢
- Linux系统:开源+可以选择非图形化
3、使用Xshell连接服务器
本地下载安装Xshell:https://www.xshell.com/zh/xshell-download/
方式一:


方式二:也可以直接Xshell命令行中直接输入:
ssh root@101.201.52.143
弹出的验证框中输入密码即可

出现这个界面则表示连接成功:

三、配置服务器
1、关于端口
ip地址:定位电脑(服务器)
端口:定位程序
| 端口 | 应用程序 |
|---|---|
| 22 | SSH |
| 3306 | MySQL |
| 6379 | Redis |
| 80 | http |
| 443 | https |
2、配置服务器的安全组(入方向)
目的:配置服务器的开放端口,使得可以通过ip+端口远程连接对应的服务。

根据需要开放对应的端口。
四、上传代码
1、下载并安装git
百度网盘链接:https://pan.baidu.com/s/1MWce-lSTlnt5xRP1VGXFBw
提取码:ggit
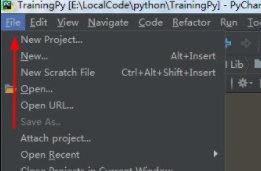
安装成功在电脑任意位置右键出现git bash here和git gui here如下:

2、将项目代码上传gitee仓库
gitee官网:https://gitee.com/
完成登录后,点击右上角创建仓库:

仓库名称一般就是项目代码名称,方便对应,填好名称点击创建即可。
仓库地址:https://gitee.com/kd_harden_iring/test
3、本地项目,用一个简单的flask项目示例

4、在项目的根目录下配置一个.gitignore文件,使得使用git上传代码时可以忽略一些文件,比如.venv,.idea是本机的虚拟文件不需要上传
直接使用别人写好的:https://github.com/github/gitignore/blob/main/Python.gitignore
# Byte-compiled / optimized / DLL files
__pycache__/
*.py[cod]
*$py.class

# C extensions
*.so

# Distribution / packaging
.Python
build/
develop-eggs/
dist/
downloads/
eggs/
.eggs/
lib/
lib64/
parts/
sdist/
var/
wheels/
share/python-wheels/
*.egg-info/
.installed.cfg
*.egg
MANIFEST

# PyInstaller
#  Usually these files are written by a python script from a template
#  before PyInstaller builds the exe, so as to inject date/other infos into it.
*.manifest
*.spec

# Installer logs
pip-log.txt
pip-delete-this-directory.txt

# Unit test / coverage reports
htmlcov/
.tox/
.nox/
.coverage
.coverage.*
.cache
nosetests.xml
coverage.xml
*.cover
*.py,cover
.hypothesis/
.pytest_cache/
cover/

# Translations
*.mo
*.pot

# Django stuff:
*.log
local_settings.py
db.sqlite3
db.sqlite3-journal

# Flask stuff:
instance/
.webassets-cache

# Scrapy stuff:
.scrapy

# Sphinx documentation
docs/_build/

# PyBuilder
.pybuilder/
target/

# Jupyter Notebook
.ipynb_checkpoints

# IPython
profile_default/
ipython_config.py

# pyenv
#   For a library or package, you might want to ignore these files since the code is
#   intended to run in multiple environments; otherwise, check them in:
# .python-version

# pipenv
#   According to pypa/pipenv#598, it is recommended to include Pipfile.lock in version control.
#   However, in case of collaboration, if having platform-specific dependencies or dependencies
#   having no cross-platform support, pipenv may install dependencies that don't work, or not
#   install all needed dependencies.
#Pipfile.lock

# poetry
#   Similar to Pipfile.lock, it is generally recommended to include poetry.lock in version control.
#   This is especially recommended for binary packages to ensure reproducibility, and is more
#   commonly ignored for libraries.
#   https://python-poetry.org/docs/basic-usage/#commit-your-poetrylock-file-to-version-control
#poetry.lock

# pdm
#   Similar to Pipfile.lock, it is generally recommended to include pdm.lock in version control.
#pdm.lock
#   pdm stores project-wide configurations in .pdm.toml, but it is recommended to not include it
#   in version control.
#   https://pdm.fming.dev/#use-with-ide
.pdm.toml

# PEP 582; used by e.g. github.com/David-OConnor/pyflow and github.com/pdm-project/pdm
__pypackages__/

# Celery stuff
celerybeat-schedule
celerybeat.pid

# SageMath parsed files
*.sage.py

# Environments
.env
.venv
env/
venv/
ENV/
env.bak/
venv.bak/

# Spyder project settings
.spyderproject
.spyproject

# Rope project settings
.ropeproject

# mkdocs documentation
/site

# mypy
.mypy_cache/
.dmypy.json
dmypy.json

# Pyre type checker
.pyre/

# pytype static type analyzer
.pytype/

# Cython debug symbols
cython_debug/

# PyCharm
#  JetBrains specific template is maintained in a separate JetBrains.gitignore that can
#  be found at https://github.com/github/gitignore/blob/main/Global/JetBrains.gitignore
#  and can be added to the global gitignore or merged into this file.  For a more nuclear
#  option (not recommended) you can uncomment the following to ignore the entire idea folder.
#.idea/
5、使用git的相关命令进行上传
1)配置自己的相关信息(便于协同项目区分是谁上传的)
任意位置右键,git bash here出现git命令行窗口输入(一次性命令):
git config --global user.name “yjx”
git config --global user.email “3360@163.com”

2)进入自己项目的目录(pycharm中右键–》打开于–》Explorer)

在该位置右键,点击git bash here再依次输入:
git init
git remote add origin https://gitee.com/kd_harden_iring/test
注意:git  init执行后可以看到在当前目录下生成了一个空的.git本地仓库
git remote add 别名代指远程仓库地址(下次使用)  远程仓库的地址(注意替换为自己在gitee中生成的远程仓库链接)

3)继续在git bash here中输入:
git add .
git commit -m 'init'
git push origin master
'init'为了标识每次提交的说明,输入以上三句即可完成将代码提交到gitee远程仓库。
注意:执行第三句会弹出输入账号和密码,这个账号和密码是gitee网站的账号和密码

执行后即可在gitee仓库中看到如下内容:

4)提交之后如果后期有修改,同样到项目根目录,git bash here再输入以上三个命令:
git add .
git commit -m 'update_module'
git push origin master
即可更新仓库,同步本地和远程仓库的代码。
五、服务器拉取远程仓库的代码
1、使用xShell连接服务器,安装git
yum install git -y

2、为你的项目在服务器上创建一个文件夹,比如在/data/www/下创建
cd /data/
mkdirs www
cd /data/www/
3、从远程仓库拉取项目代码
git clone https://gitee.com/kd_harden_iring/test
前面生成的gitee仓库的连接,切换为自己的

六、服务器中安装环境
Python3.9.5
虚拟环境
uwsgi:接收用户的请求,高效
nginx:反向代理请求,分类用户请求,转发用户请求

1、安装Python3.9.5
在Xshell中运行以下命令:

注:执行yum install mysql-devel -y可能会报错,具体解决:
- 先执行wget http://repo.mysql.com/mysql57-community-release-el7-8.noarch.rpm
- 再执行rpm --import https://repo.mysql.com/RPM-GPG-KEY-mysql-2022
- 最后执行yum install mysql-devel -y
下载Python3.9.5源码:
yum install wget -y
cd /data/
wget https://www.python.org/ftp/python/3.9.5/Python-3.9.5.tgz
解压—编译—安装:
tar -xvf Python-3.9.5.tgz
cd Python-3.9.5.tgz
./configure
make all
make install
Python解释器配置豆瓣源:
pip3.9 config set global.index-url https://pypi.douban.com/simple/
2、虚拟环境配置
1)安装 virtualenv
pip3.9 install virtualenv
2)创建虚拟环境(一般是一个项目一个虚拟环境)
mkdir /envs
cd /envs/
virtualenv /envs/test --python=python3.9

3)激活虚拟环境
source  /envs/test/bin/activate
pip install flask

4)在虚拟环境中运行代码(类似本地运行)

3、uwsgi安装
1)安装uwsgi
激活虚拟环境,在虚拟环境中安装
source  /envs/test/bin/activate
pip install uwsgi

2)基于uwsgi配置文件的方式运行flask项目
cd /data/www/test/
vim test_uwsgi.ini
编写uwsgi的配置文件:
	[uwsgi]
	socket = 127.0.0.1:8001
	chdir = /data/www/test/
	wsgi-file = app.py
	callable = app
	processes = 1
	virtualenv = /envs/test/


3)启动uwsgi的方式:
uwsgi --ini test _uwsgi.ini

4、Nginx安装
1)安装nginx
yum install nginx -y
2)修改配置nginx
vim /etc/nginx/nginx.conf

3)设置nginx开机自启动并启动nginx服务
systemctl enable nginx
systemctl start nginx
如果无法启动80端口被占用,输入以下命令查看并关闭相关进程:
lsof -i:80 80端口被占用的问题查看

如上:关闭httpd即可
再次启动nginx即可成功:systemctl start nginx
七、服务器运行程序并通过公网进行访问测试
nginx启动后,依次执行以下语句即可拉起test项目
source /envs/test/bin/activate
cd /data/www/test/
uwsgi --ini test_uwsgi.ini >nohup.out
浏览器中输入你服务器的公网ip,即可看到你的项目


注意:
每个项目所依赖的库不同,需要你在虚拟环境中下载对应的使用到的库。
文章参考
B站链接:
https://www.bilibili.com/video/BV1gR4y1D7qe?p=1&vd_source=d017010c9713a9f8e98390906782f3ef
到此这篇关于Python Web项目部署详细教程的文章就介绍到这了,更多相关内容请搜索服务器之家以前的文章或继续浏览下面的相关文章希望大家以后多多支持服务器之家!
原文地址:https://blog.csdn.net/qq_45929019/article/details/131641655


")