TextView加载字体包
在 Android 中,若需要使得某个TextView加载字体包,使用以下方式即可:
|
1
2
|
Typeface typeFace =Typeface.createFromAsset(getAssets(),"fonts/Bold.otf"); textView.setTypeface(typeFace); |
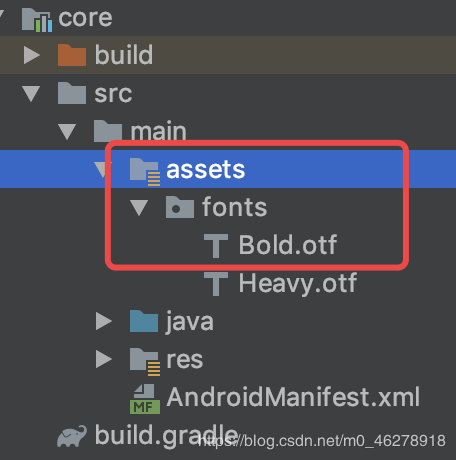
至于字体包的位置:

通过以上方法,可以使得一个TextView加载某种字体包,但是,还有这种需求:
-
部分
TextView加载字体包 -
每个
TextView加载的字体包不一定一样
这时,我们就需要稍微封装下,将其封装成一个自定义TextView类,若需要使用字体包,则加载该类,同时,可以根据xml里面的值,从而加载不同的字体包。
封装
定义属性值
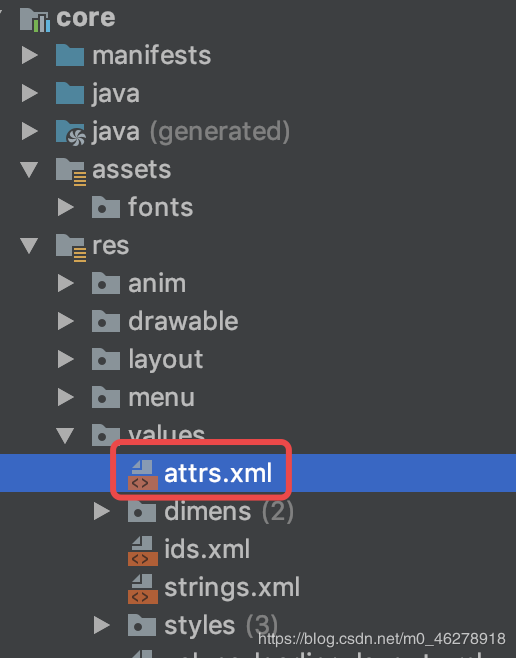
首先,我们需要从xml里面获取值,因此,需要在attr中进行属性值的定义:

|
1
2
3
4
5
6
|
<declare-styleable name="FontTextView"> <attr name="fontType" format="enum"> <enum name="bold" value="1" /> <enum name="heavy" value="2" /> </attr> </declare-styleable> |
这里我只定义了两种属性,大家可以根据需求进行增减。
创建自定义TextView
|
1
2
3
4
5
6
7
8
9
10
11
12
|
public class FontTextView extends AppCompatTextView { public FontTextView(Context context) { super(context); } public FontTextView(Context context, @Nullable AttributeSet attrs) { this(context, attrs, 0); } public FontTextView(Context context, @Nullable AttributeSet attrs, int defStyleAttr) { super(context, attrs, defStyleAttr); }} |
获取属性值
|
1
2
3
4
5
|
//获取参数 TypedArray a = context.obtainStyledAttributes(attrs, R.styleable.FontTextView, defStyleAttr, 0); int fontType = a.getInt(R.styleable.FontTextView_fontType, 1); |
进行值判断并加载不同的字体包
|
1
2
3
4
5
6
7
8
9
10
11
12
13
14
15
16
17
18
|
private final int BOLD = 1; private final int HEAVY = 2; String fontPath = null; switch (fontType) { case BOLD: fontPath = "fonts/Bold.otf"; break; case HEAVY: fontPath = "fonts/Heavy.otf"; break; default: } //设置字体 if (!TextUtils.isEmpty(fontPath)) { Typeface typeFace = Typeface.createFromAsset(getContext().getAssets(), fontPath); setTypeface(typeFace); } |
全部源码
|
1
2
3
4
5
6
7
8
9
10
11
12
13
14
15
16
17
18
19
20
21
22
23
24
25
26
27
28
29
30
31
32
33
34
35
36
37
38
39
40
41
|
public class FontTextView extends AppCompatTextView { private final int BOLD = 1; private final int HEAVY = 2; public FontTextView(Context context) { super(context); } public FontTextView(Context context, @Nullable AttributeSet attrs) { this(context, attrs, 0); } public FontTextView(Context context, @Nullable AttributeSet attrs, int defStyleAttr) { super(context, attrs, defStyleAttr); //获取参数 TypedArray a = context.obtainStyledAttributes(attrs, R.styleable.FontTextView, defStyleAttr, 0); int fontType = a.getInt(R.styleable.FontTextView_fontType, 1); String fontPath = null; switch (fontType) { case BOLD: fontPath = "fonts/Bold.otf"; break; case HEAVY: fontPath = "fonts/Heavy.otf"; break; default: } //设置字体 if (!TextUtils.isEmpty(fontPath)) { Typeface typeFace = Typeface.createFromAsset(getContext().getAssets(), fontPath); setTypeface(typeFace); } }} |
若需要使用字体包TextView,使用以下方式即可:
|
1
2
3
4
5
|
<com.jm.core.common.widget.textview.FontTextView android:layout_width="wrap_content" android:layout_height="wrap_content" app:fontType="bold" android:text="测试" /> |
效果

到此这篇关于浅析Android加载字体包及封装的方法的文章就介绍到这了,更多相关android加载字体包封装内容请搜索服务器之家以前的文章或继续浏览下面的相关文章希望大家以后多多支持服务器之家!
原文链接:https://blog.csdn.net/m0_46278918/article/details/105822861


