基本环境
有时需要做一些前端的数据处理,但是又不想把数据出来的方式就这么简单的暴露在js里,然后就用了wasm来包装这个处理函数,当然,这样也能提高性能。
新建文件 index.js
|
1
2
3
4
5
6
7
8
9
10
11
12
13
14
15
16
|
const fastify = require('fastify')({ logger: true })const path = require('path')// Serve the static assetsfastify.register(require('fastify-static'), { root: path.join(__dirname, ''), prefix: '/'})const start = async () => { try { await fastify.listen(8080, "0.0.0.0") fastify.log.info(`server listening on ${fastify.server.address().port}`) } catch (error) { fastify.log.error(error) }}start() |
package.json
|
1
2
3
4
5
6
7
8
9
|
{ "scripts": { "dev": "node index.js" }, "dependencies": { "fastify": "^3.6.0", "fastify-static": "^3.2.1" }} |
index.html
|
1
2
3
4
5
6
7
8
9
10
|
<!DOCTYPE html><html lang="en"><head> <meta charset="UTF-8"> <title>hello</title></head><body>hello</body></html> |
运行 npm run dev 打开http://127.0.0.1:8080

wasm部分
新建 go.mod
|
1
2
|
module hello-worldgo 1.18 |
main.go
|
1
2
3
4
5
6
7
8
9
10
11
12
|
package mainimport ( "syscall/js")func main() { message := " Hello World " document := js.Global().Get("document") h2 := document.Call("createElement", "h2") h2.Set("innerHTML", message) document.Get("body").Call("appendChild", h2) <-make(chan bool)} |
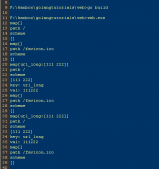
运行 go env win下
GOOS=windows
GOARCH=amd64
需要配置环境变量为 win 下设置 cmd运行 set GOOS=js set GOARCH=wasm
生成必要文件(cmd会报错 powershell可以执行) cp "$(go env GOROOT)/misc/wasm/wasm_exec.js" . 会多出一个wasm_exec.js的文件
go打包成wasm 运行go build -o main.wasm 运行结束后会生成一个名为main.wasm的文件
然后修改之前的index.html文件
|
1
2
3
4
5
6
7
8
9
10
11
12
13
14
15
16
17
18
19
20
21
22
23
24
25
26
27
28
29
30
31
32
33
34
35
36
37
38
|
<html><head> <meta charset="utf-8"/> <script src="wasm_exec.js"></script></head><body><h1>WASM</h1><script> // 判断是否支持instantiateStreaming加载 if (!WebAssembly.instantiateStreaming) { WebAssembly.instantiateStreaming = async (resp, importObject) => { const source = await (await resp).arrayBuffer() return await WebAssembly.instantiate(source, importObject) } } // 异步加载wasm文件 function loadWasm(path) { const go = new Go() return new Promise((resolve, reject) => { WebAssembly.instantiateStreaming(fetch(path), go.importObject) .then(result => { go.run(result.instance) resolve(result.instance) }) .catch(error => { reject(error) }) }) } //加载wasm文件 loadWasm("main.wasm").then(wasm => { console.log("wasm已加载 ") }).catch(error => { console.log("加载出错了", error) })</script></body></html> |
然后刷新浏览器就能看到这么一个界面

以上就是go打包网页wasm示例详解的详细内容,更多关于go打包网页wasm的资料请关注服务器之家其它相关文章!
原文链接:https://juejin.cn/post/7133612627531399198