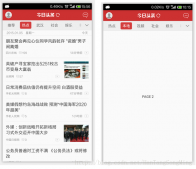
本文实例为大家分享了Flutter实现底部导航的具体代码,供大家参考,具体内容如下
BottomNavigationBar使用
底部导航栏 主文件 main.dart (注意导入文件路径)
|
1
2
3
4
5
6
7
8
9
10
11
12
13
14
15
16
17
18
19
20
21
22
23
24
25
26
27
28
29
30
31
32
33
34
35
36
37
38
39
40
41
42
43
44
45
46
47
48
49
50
51
52
53
54
55
56
57
58
59
60
61
62
63
64
65
66
67
68
69
70
71
72
73
74
75
76
77
78
79
80
81
82
83
84
85
86
87
88
89
90
91
92
|
import 'package:flutter/material.dart';import './views/firstPage.dart';import './views/secondPage.dart';import './views/thirdPage.dart';//首先导入三个界面void main() { runApp(new MyApp());}class MyApp extends StatefulWidget { @override _MyHomePageState createState() => new _MyHomePageState();}class _MyHomePageState extends State<MyApp> with TickerProviderStateMixin{ int _tabIndex = 0; List<BottomNavigationBarItem> _navigationViews; var appBarTitles = ['首页', '发现', '我的']; PageController pageController; var _body; initData() { _body = new IndexedStack( children: <Widget>[new FirstPage(), new SecondPage(), new ThirdPage()], index: _tabIndex, ); } @override void initState() { super.initState(); _navigationViews = <BottomNavigationBarItem>[ new BottomNavigationBarItem( icon: const Icon(Icons.home), title: new Text(appBarTitles[0]), backgroundColor: Colors.blue, ), new BottomNavigationBarItem( icon: const Icon(Icons.widgets), title: new Text(appBarTitles[1]), backgroundColor: Colors.blue, ), new BottomNavigationBarItem( icon: const Icon(Icons.person), title: new Text(appBarTitles[2]), backgroundColor: Colors.blue, ), ]; } final navigatorKey = GlobalKey<NavigatorState>(); @override Widget build(BuildContext context) { initData(); return new MaterialApp( navigatorKey: navigatorKey, theme: new ThemeData( primaryColor: Colors.blue, accentColor: Colors.blue ), home: new Scaffold( appBar: new AppBar( title: new Text( appBarTitles[_tabIndex], style: new TextStyle(color: Colors.white), ), ), body: _body, bottomNavigationBar: new BottomNavigationBar( items: _navigationViews .map((BottomNavigationBarItem navigationView) => navigationView) .toList(), currentIndex: _tabIndex, type: BottomNavigationBarType.fixed, onTap: (index) { setState(() { _tabIndex = index; }); }, ), ), ); }} |
底部包含三个导航按钮,分别对应三个界面:
firstPage.dart
|
1
2
3
4
5
6
7
8
9
10
11
12
13
14
15
16
17
18
19
|
import 'package:flutter/material.dart';class FirstPage extends StatefulWidget { @override State<StatefulWidget> createState() => new FirstPageState();}class FirstPageState extends State<FirstPage> { @override Widget build(BuildContext context) { return new Scaffold( body: new Center( child: new Text('这是第一个界面'), ), ); }} |
secondPage.dart
|
1
2
3
4
5
6
7
8
9
10
11
12
13
14
15
16
17
18
|
import 'package:flutter/material.dart';class SecondPage extends StatefulWidget { @override State<StatefulWidget> createState() => SecondPageState();}class SecondPageState extends State<SecondPage> { @override Widget build(BuildContext context) { return new Scaffold( body: new Center( child: new Text("这是我第二个页面"), ), ); }} |
thirdPage.dart
|
1
2
3
4
5
6
7
8
9
10
11
12
13
14
15
16
17
18
|
import 'package:flutter/material.dart';class ThirdPage extends StatefulWidget { @override State<StatefulWidget> createState() => ThirdPageState();}class ThirdPageState extends State<ThirdPage>{ @override Widget build(BuildContext context) { return new Scaffold( body: new Center( child: new Text('我是界面三'), ), ); }} |
运行截图:

以上就是本文的全部内容,希望对大家的学习有所帮助,也希望大家多多支持服务器之家。
原文链接:https://blog.csdn.net/qq_32228189/article/details/81563785


