首先看一下阿里云官方的教程:
文件说明:
1. 证书文件xxxxxx.pem,包含两段内容,请不要删除任何一段内容。
2. 如果是证书系统创建的CSR,还包含:证书私钥文件xxxxxxxx.key、证书公钥文件public.pem、证书链文件chain.pem。
( 1 ) 在Apache的安装目录下创建cert目录,并且将下载的全部文件拷贝到cert目录中。如果申请证书时是自己创建的CSR文件,请将对应的私钥文件放到cert目录下并且命名为xxxxxxxx.key;
( 2 ) 打开 apache 安装目录下 conf 目录中的 httpd.conf 文件,找到以下内容并去掉“#”:
|
1
2
|
#LoadModule ssl_module modules/mod_ssl.so (如果找不到请确认是否编译过 openssl 插件)#Include conf/extra/httpd-ssl.conf |
( 3 ) 打开 apache 安装目录下 conf/extra/httpd-ssl.conf 文件 (也可能是conf.d/ssl.conf,与操作系统及安装方式有关), 在配置文件中查找以下配置语句:
|
1
2
3
4
5
6
7
8
9
10
11
|
# 添加 SSL 协议支持协议,去掉不安全的协议SSLProtocol all -SSLv2 -SSLv3# 修改加密套件如下SSLCipherSuite HIGH:!RC4:!MD5:!aNULL:!eNULL:!NULL:!DH:!EDH:!EXP:+MEDIUMSSLHonorCipherOrder on# 证书公钥配置SSLCertificateFile cert/public.pem# 证书私钥配置SSLCertificateKeyFile cert/xxxxxxx.key# 证书链配置,如果该属性开头有 '#'字符,请删除掉SSLCertificateChainFile cert/chain.pem |
( 4 ) 重启 Apache。
( 5 ) 通过 https 方式访问您的站点,测试站点证书的安装配置,如遇到证书不信任问题,请查看帮助视频。
然而这只能参考。在Ubuntu下面,我是用apt安装的Apache,但是它没有httpd.conf,只有一个apache2.conf,好吧,其实这个文件和httpd.conf差不多,它里面是这样注释的:
|
1
2
3
4
5
6
7
8
9
10
11
12
13
14
|
# It is split into several files forming the configuration hierarchy outlined# below, all located in the /etc/apache2/ directory:## /etc/apache2/# |-- apache2.conf# | `-- ports.conf# |-- mods-enabled# | |-- *.load# | `-- *.conf# |-- conf-enabled# | `-- *.conf# `-- sites-enabled# `-- *.conf# |
这个版本的Apache把配置文件分散到了其他小文件中,结构就是上面那样子的。你要是愿意的话,也可以自己写一个httpd.conf然后include进去。
重点讲一下https的配置,第一步,你要保证你外部环境的443端口是打开的。
第二步确保你安装了ssl_module。没有就apt-get install openssl ,可能还需要一些依赖,但是都是小问题。
然后打开ports.conf,以下几句是不可少的:
|
1
2
3
4
5
6
7
|
<IfModule ssl_module> Listen 443</IfModule> <IfModule mod_gnutls.c> Listen 443</IfModule> |
接着打开mods-available,找到ssl.conf和ssl.load
ssl.load长这样:
|
1
2
3
4
5
6
7
8
9
10
11
12
13
14
15
16
17
18
19
20
21
22
23
24
25
26
27
28
29
30
31
32
33
34
35
36
37
38
39
40
41
42
43
44
45
46
47
48
49
50
51
52
53
54
55
56
57
58
59
60
61
62
63
64
65
66
67
68
69
70
71
72
73
74
75
76
77
78
79
80
81
82
83
84
85
86
87
88
|
# Depends: setenvif mime socache_shmcbLoadModule ssl_module /usr/lib/apache2/modules/mod_ssl.sossl.conf长这样:<IfModule mod_ssl.c> # Pseudo Random Number Generator (PRNG): # Configure one or more sources to seed the PRNG of the SSL library. # The seed data should be of good random quality. # WARNING! On some platforms /dev/random blocks if not enough entropy # is available. This means you then cannot use the /dev/random device # because it would lead to very long connection times (as long as # it requires to make more entropy available). But usually those # platforms additionally provide a /dev/urandom device which doesn't # block. So, if available, use this one instead. Read the mod_ssl User # Manual for more details. # SSLRandomSeed startup builtin SSLRandomSeed startup file:/dev/urandom 512 SSLRandomSeed connect builtin SSLRandomSeed connect file:/dev/urandom 512 ## ## SSL Global Context ## ## All SSL configuration in this context applies both to ## the main server and all SSL-enabled virtual hosts. ## # # Some MIME-types for downloading Certificates and CRLs # AddType application/x-x509-ca-cert .crt AddType application/x-pkcs7-crl .crl # Pass Phrase Dialog: # Configure the pass phrase gathering process. # The filtering dialog program (`builtin' is a internal # terminal dialog) has to provide the pass phrase on stdout. SSLPassPhraseDialog exec:/usr/share/apache2/ask-for-passphrase # Inter-Process Session Cache: # Configure the SSL Session Cache: First the mechanism # to use and second the expiring timeout (in seconds). # (The mechanism dbm has known memory leaks and should not be used). #SSLSessionCache dbm:${APACHE_RUN_DIR}/ssl_scache SSLSessionCache shmcb:${APACHE_RUN_DIR}/ssl_scache(512000) SSLSessionCacheTimeout 300 # Semaphore: # Configure the path to the mutual exclusion semaphore the # SSL engine uses internally for inter-process synchronization. # (Disabled by default, the global Mutex directive consolidates by default # this) #Mutex file:${APACHE_LOCK_DIR}/ssl_mutex ssl-cache # SSL Cipher Suite: # List the ciphers that the client is permitted to negotiate. See the # ciphers(1) man page from the openssl package for list of all available # options. # Enable only secure ciphers: SSLCipherSuite HIGH:!RC4:!MD5:!aNULL:!eNULL:!NULL:!DH:!EDH:!EXP:+MEDIUM # SSL server cipher order preference: # Use server priorities for cipher algorithm choice. # Clients may prefer lower grade encryption. You should enable this # option if you want to enforce stronger encryption, and can afford # the CPU cost, and did not override SSLCipherSuite in a way that puts # insecure ciphers first. # Default: Off SSLHonorCipherOrder on # The protocols to enable. # Available values: all, SSLv3, TLSv1, TLSv1.1, TLSv1.2 # SSL v2 is no longer supported SSLProtocol all -SSLv2 -SSLv3 # Allow insecure renegotiation with clients which do not yet support the # secure renegotiation protocol. Default: Off #SSLInsecureRenegotiation on # Whether to forbid non-SNI clients to access name based virtual hosts. # Default: Off #SSLStrictSNIVHostCheck On </IfModule> # vim: syntax=apache ts=4 sw=4 sts=4 sr noet |
之后就是站点的配置了,这里使用默认的default-ssl.conf:
|
1
2
3
4
5
6
7
8
9
10
11
12
13
14
15
16
17
18
19
20
21
22
23
24
25
26
27
28
29
30
31
32
33
34
35
36
37
38
39
40
41
42
43
44
45
46
47
48
49
50
51
52
53
54
55
56
57
58
59
60
61
62
63
64
65
66
67
68
69
70
71
72
73
74
75
76
77
78
79
80
81
82
83
84
85
86
87
88
89
90
91
92
93
94
95
96
97
98
99
100
101
102
103
104
105
106
107
108
109
110
111
112
113
114
115
116
117
118
119
120
121
122
123
124
125
126
127
128
129
130
131
132
133
134
135
136
|
<IfModule mod_ssl.c> <VirtualHost _default_:443> ServerName ################加入你自己的站点配置########## # Available loglevels: trace8, ..., trace1, debug, info, notice, warn, # error, crit, alert, emerg. # It is also possible to configure the loglevel for particular # modules, e.g. #LogLevel info ssl:warn ErrorLog ${APACHE_LOG_DIR}/error.log CustomLog ${APACHE_LOG_DIR}/access.log combined # For most configuration files from conf-available/, which are # enabled or disabled at a global level, it is possible to # include a line for only one particular virtual host. For example the # following line enables the CGI configuration for this host only # after it has been globally disabled with "a2disconf". #Include conf-available/serve-cgi-bin.conf # SSL Engine Switch: # Enable/Disable SSL for this virtual host. SSLEngine on # A self-signed (snakeoil) certificate can be created by installing # the ssl-cert package. See # /usr/share/doc/apache2/README.Debian.gz for more info. # If both key and certificate are stored in the same file, only the # SSLCertificateFile directive is needed. SSLCertificateFile /etc/apache2/cert/public.pem SSLCertificateKeyFile /etc/apache2/cert/xxxxxxx.key # Server Certificate Chain: # Point SSLCertificateChainFile at a file containing the # concatenation of PEM encoded CA certificates which form the # certificate chain for the server certificate. Alternatively # the referenced file can be the same as SSLCertificateFile # when the CA certificates are directly appended to the server # certificate for convinience. SSLCertificateChainFile /etc/apache2/cert/chain.pem # Certificate Authority (CA): # Set the CA certificate verification path where to find CA # certificates for client authentication or alternatively one # huge file containing all of them (file must be PEM encoded) # Note: Inside SSLCACertificatePath you need hash symlinks # to point to the certificate files. Use the provided # Makefile to update the hash symlinks after changes. #SSLCACertificatePath /etc/ssl/certs/ #SSLCACertificateFile /etc/apache2/ssl.crt/ca-bundle.crt # Certificate Revocation Lists (CRL): # Set the CA revocation path where to find CA CRLs for client # authentication or alternatively one huge file containing all # of them (file must be PEM encoded) # Note: Inside SSLCARevocationPath you need hash symlinks # to point to the certificate files. Use the provided # Makefile to update the hash symlinks after changes. #SSLCARevocationPath /etc/apache2/ssl.crl/ #SSLCARevocationFile /etc/apache2/ssl.crl/ca-bundle.crl # Client Authentication (Type): # Client certificate verification type and depth. Types are # none, optional, require and optional_no_ca. Depth is a # number which specifies how deeply to verify the certificate # issuer chain before deciding the certificate is not valid. #SSLVerifyClient require #SSLVerifyDepth 10 # SSL Engine Options: # Set various options for the SSL engine. # o FakeBasicAuth: # Translate the client X.509 into a Basic Authorisation. This means that # the standard Auth/DBMAuth methods can be used for access control. The # user name is the `one line' version of the client's X.509 certificate. # Note that no password is obtained from the user. Every entry in the user # file needs this password: `xxj31ZMTZzkVA'. # o ExportCertData: # This exports two additional environment variables: SSL_CLIENT_CERT and # SSL_SERVER_CERT. These contain the PEM-encoded certificates of the # server (always existing) and the client (only existing when client # authentication is used). This can be used to import the certificates # into CGI scripts. # o StdEnvVars: # This exports the standard SSL/TLS related `SSL_*' environment variables. # Per default this exportation is switched off for performance reasons, # because the extraction step is an expensive operation and is usually # useless for serving static content. So one usually enables the # exportation for CGI and SSI requests only. # o OptRenegotiate: # This enables optimized SSL connection renegotiation handling when SSL # directives are used in per-directory context. #SSLOptions +FakeBasicAuth +ExportCertData +StrictRequire <FilesMatch "\.(cgi|shtml|phtml|php)$"> SSLOptions +StdEnvVars </FilesMatch> <Directory /usr/lib/cgi-bin> SSLOptions +StdEnvVars </Directory> # SSL Protocol Adjustments: # The safe and default but still SSL/TLS standard compliant shutdown # approach is that mod_ssl sends the close notify alert but doesn't wait for # the close notify alert from client. When you need a different shutdown # approach you can use one of the following variables: # o ssl-unclean-shutdown: # This forces an unclean shutdown when the connection is closed, i.e. no # SSL close notify alert is send or allowed to received. This violates # the SSL/TLS standard but is needed for some brain-dead browsers. Use # this when you receive I/O errors because of the standard approach where # mod_ssl sends the close notify alert. # o ssl-accurate-shutdown: # This forces an accurate shutdown when the connection is closed, i.e. a # SSL close notify alert is send and mod_ssl waits for the close notify # alert of the client. This is 100% SSL/TLS standard compliant, but in # practice often causes hanging connections with brain-dead browsers. Use # this only for browsers where you know that their SSL implementation # works correctly. # Notice: Most problems of broken clients are also related to the HTTP # keep-alive facility, so you usually additionally want to disable # keep-alive for those clients, too. Use variable "nokeepalive" for this. # Similarly, one has to force some clients to use HTTP/1.0 to workaround # their broken HTTP/1.1 implementation. Use variables "downgrade-1.0" and # "force-response-1.0" for this. # BrowserMatch "MSIE [2-6]" \ # nokeepalive ssl-unclean-shutdown \ # downgrade-1.0 force-response-1.0 </VirtualHost></IfModule> # vim: syntax=apache ts=4 sw=4 sts=4 sr noet |
发现了吗,这是把阿里云教程里的配置项分散到了两个配置文件里面。
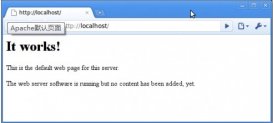
然后在浏览器上使用https访问,成功。(linux可以使用wget或curl测试)
以上就是本文的全部内容,希望对大家的学习有所帮助,也希望大家多多支持服务器之家。
原文链接:https://blog.csdn.net/qq_32795135/article/details/79341400


