正文
本文包括两部分,一部分是源码解读,另一部分是对zap的增强。
由于zap是一个log库,所以从两方面来深入阅读zap的源码,一个是初始化logger的流程,一个是打一条log的流程。
初始化Logger
zap的Logger是一般通过一个Config结构体初始化的,首先看下这个结构体有哪些字段
|
1
2
3
4
5
6
7
8
9
10
11
12
13
14
15
16
17
18
19
20
21
22
|
type Config struct { // 日志Level,因为可以动态更改,所以是atomic类型的,毕竟比锁的性能好 Level AtomicLevel `json:"level" yaml:"level"` // dev模式,启用后会更改在某些使用情形下的行为,后面源码解读模块会具体看到有什么作用 Development bool `json:"development" yaml:"development"` // 禁用caller,caller就是会在打的log里加一条属性,表示这条日志是在哪里打的,例如"httpd/svc.go:123" DisableCaller bool `json:"disableCaller" yaml:"disableCaller"` // 是否要在log里加上调用栈,dev模式下只有WarnLevel模式以上有调用栈,prod模式下只有ErrorLevel以上有调用栈 DisableStacktrace bool `json:"disableStacktrace" yaml:"disableStacktrace"` // 采样策略,控制打log的速率,也可以做一些其他自定义的操作,不难理解,具体看下面的SamplingConfig Sampling *SamplingConfig `json:"sampling" yaml:"sampling"` // log格式,自带的有json和console两种格式,可以通过使用RegisterEncoder来自定义log格式 Encoding string `json:"encoding" yaml:"encoding"` // log格式具体配置,详细看下面的EncoderConfig EncoderConfig zapcore.EncoderConfig `json:"encoderConfig" yaml:"encoderConfig"` // log输出路径,看结构表示可以有多个输出路径 OutputPaths []string `json:"outputPaths" yaml:"outputPaths"` // 内部错误输出路径,默认是stderr ErrorOutputPaths []string `json:"errorOutputPaths" yaml:"errorOutputPaths"` // 每条log都会加上InitialFields里的内容,顾名思义 InitialFields map[string]interface{} `json:"initialFields" yaml:"initialFields"`} |
|
1
2
3
4
5
6
7
8
9
10
11
12
13
14
15
16
17
18
19
20
21
22
23
24
25
26
27
28
29
30
31
32
33
34
35
36
37
38
39
40
41
42
43
44
45
46
47
48
49
50
51
52
53
54
55
56
57
58
59
60
61
62
63
64
65
66
67
68
|
// 采样策略配置,大致的逻辑是每秒超过Thereafter个相同msg的log会执行自定义的Hook函数(第二个参数为一个标志,LogDropped),具体逻辑可以看下面的源码解析type SamplingConfig struct { Initial int `json:"initial" yaml:"initial"` Thereafter int `json:"thereafter" yaml:"thereafter"` Hook func(zapcore.Entry, zapcore.SamplingDecision) `json:"-" yaml:"-"`}const ( _numLevels = _maxLevel - _minLevel + 1 _countersPerLevel = 4096)// 用来记录日志打了多少条type counter struct { resetAt atomic.Int64 counter atomic.Uint64}type counters [_numLevels][_countersPerLevel]counter// 这里可以看到sampler就是Core外面包了一层Wrappertype sampler struct { Core counts *counters tick time.Duration // 这里的tick在初始化Logger的时候已经写死了是time.Second,也就是1秒 first, thereafter uint64 hook func(Entry, SamplingDecision)}// 所有的Core.Check都会先走sampler.Check,然后再走Core.Checkfunc (s *sampler) Check(ent Entry, ce *CheckedEntry) *CheckedEntry { if !s.Enabled(ent.Level) { return ce } if ent.Level >= _minLevel && ent.Level <= _maxLevel { // 根据Message获取counter,也就是这个Message打过几次日志了 counter := s.counts.get(ent.Level, ent.Message) // 打一条Message就会记录一次到counters里,不过每秒会重置一次counter,具体看IncCheckReset里的逻辑 n := counter.IncCheckReset(ent.Time, s.tick) // first表示最初的first条日志调用hook时第二个参数传LogSampled,超过first的日志,每threrafter条日志第二个参数传LogSampled,否则传LogDropped // 假设first是100,thereafter是50,表示同一个Message的log,最初的100条全都会记录,之后的log在每秒钟内,每50条记录一次 if n > s.first && (s.thereafter == 0 || (n-s.first)%s.thereafter != 0) { s.hook(ent, LogDropped) return ce } s.hook(ent, LogSampled) } return s.Core.Check(ent, ce)}// 这里可能会出现意想不到的情况// 因为_countersPerLevel写死了是4096,那么必然会存在不同的key做完hash后取模会路由到相同的counter里// 那么就会有概率丢弃掉没有达到丢弃阈值的log// 假设abc和def的hash值一样,first是0,thereafter是10,表示每秒钟每种log每10条才会记录1次,那么abc和def这两种log就会共享同一个counter,这就是问题所在func (cs *counters) get(lvl Level, key string) *counter { i := lvl - _minLevel // fnv32a是一个hash函数 // _countersPerLevel固定是4096 j := fnv32a(key) % _countersPerLevel return &cs[i][j]}func (c *counter) IncCheckReset(t time.Time, tick time.Duration) uint64 { tn := t.UnixNano() resetAfter := c.resetAt.Load() if resetAfter > tn { return c.counter.Inc() } c.counter.Store(1) newResetAfter := tn + tick.Nanoseconds() if !c.resetAt.CAS(resetAfter, newResetAfter) { return c.counter.Inc() } return 1} |
|
1
2
3
4
5
6
7
8
9
10
11
12
13
14
15
16
17
18
19
20
21
22
23
24
25
26
27
|
// log格式的详细设置type EncoderConfig struct { // 设置log内容里的一些属性的key MessageKey string `json:"messageKey" yaml:"messageKey"` LevelKey string `json:"levelKey" yaml:"levelKey"` TimeKey string `json:"timeKey" yaml:"timeKey"` NameKey string `json:"nameKey" yaml:"nameKey"` CallerKey string `json:"callerKey" yaml:"callerKey"` FunctionKey string `json:"functionKey" yaml:"functionKey"` StacktraceKey string `json:"stacktraceKey" yaml:"stacktraceKey"` // 顾名思义不解释 SkipLineEnding bool `json:"skipLineEnding" yaml:"skipLineEnding"` LineEnding string `json:"lineEnding" yaml:"lineEnding"` // Configure the primitive representations of common complex types. For // example, some users may want all time.Times serialized as floating-point // seconds since epoch, while others may prefer ISO8601 strings. // 自定义一些属性的格式,例如指定Time字段格式化为2022-05-23 16:16:16 EncodeLevel LevelEncoder `json:"levelEncoder" yaml:"levelEncoder"` EncodeTime TimeEncoder `json:"timeEncoder" yaml:"timeEncoder"` EncodeDuration DurationEncoder `json:"durationEncoder" yaml:"durationEncoder"` EncodeCaller CallerEncoder `json:"callerEncoder" yaml:"callerEncoder"` EncodeName NameEncoder `json:"nameEncoder" yaml:"nameEncoder"` // 用于interface类型的encoder,可以自定义,默认为jsonEncoder NewReflectedEncoder func(io.Writer) ReflectedEncoder `json:"-" yaml:"-"` // console格式的分隔符,默认是tab ConsoleSeparator string `json:"consoleSeparator" yaml:"consoleSeparator"`} |
Config里的大部分字段都有tag,可以通过UnmarshalJson或者UnmarshalYaml来配置,可以在全局的config文件来配置,非常方便。
通过以上的config就可以初始化一个logger,下面贴代码
|
1
2
3
4
5
6
7
8
9
10
11
12
13
14
15
16
17
18
19
20
21
22
23
24
25
26
|
// 通过Config结构体Build出一个Loggerfunc (cfg Config) Build(opts ...Option) (*Logger, error) { // 核心函数buildEncoder enc, err := cfg.buildEncoder() if err != nil { return nil, err } // 核心函数openSinks sink, errSink, err := cfg.openSinks() if err != nil { return nil, err } if cfg.Level == (AtomicLevel{}) { return nil, fmt.Errorf("missing Level") } // 核心函数New log := New( // 核心函数NewCore zapcore.NewCore(enc, sink, cfg.Level), cfg.buildOptions(errSink)..., ) if len(opts) > 0 { log = log.WithOptions(opts...) } return log, nil} |
|
1
2
3
4
5
6
7
8
9
10
11
12
13
14
15
16
17
18
19
20
21
22
23
24
25
26
27
28
29
30
31
32
33
34
35
36
37
38
39
40
41
42
43
44
45
46
47
48
49
50
|
// 核心函数buildEncoderfunc (cfg Config) buildEncoder() (zapcore.Encoder, error) { return newEncoder(cfg.Encoding, cfg.EncoderConfig)}// _encoderNameToConstructor是一个map[string]constructor,plugin式写法,可以通过RegisterEncoder函数注册自定义的Encoder,默认只有console和json_encoderNameToConstructor = map[string]func(zapcore.EncoderConfig) (zapcore.Encoder, error){ "console": func(encoderConfig zapcore.EncoderConfig) (zapcore.Encoder, error) { return zapcore.NewConsoleEncoder(encoderConfig), nil }, "json": func(encoderConfig zapcore.EncoderConfig) (zapcore.Encoder, error) { return zapcore.NewJSONEncoder(encoderConfig), nil },}func newEncoder(name string, encoderConfig zapcore.EncoderConfig) (zapcore.Encoder, error) { if encoderConfig.TimeKey != "" && encoderConfig.EncodeTime == nil { return nil, fmt.Errorf("missing EncodeTime in EncoderConfig") } _encoderMutex.RLock() defer _encoderMutex.RUnlock() if name == "" { return nil, errNoEncoderNameSpecified } // 通过name,也就是Config.Encoding来决定使用哪种encoder constructor, ok := _encoderNameToConstructor[name] if !ok { return nil, fmt.Errorf("no encoder registered for name %q", name) } return constructor(encoderConfig)}// 这里只展示jsonEncoder的逻辑,consoleEncoder和jsonEncoder差别不大func NewJSONEncoder(cfg EncoderConfig) Encoder { return newJSONEncoder(cfg, false)}func newJSONEncoder(cfg EncoderConfig, spaced bool) *jsonEncoder { if cfg.SkipLineEnding { cfg.LineEnding = "" } else if cfg.LineEnding == "" { cfg.LineEnding = DefaultLineEnding } // If no EncoderConfig.NewReflectedEncoder is provided by the user, then use default if cfg.NewReflectedEncoder == nil { cfg.NewReflectedEncoder = defaultReflectedEncoder } return &jsonEncoder{ EncoderConfig: &cfg, // 这个buf是高性能的关键之一,使用了简化的bytesBuffer和sync.Pool,代码贴在下面 buf: bufferpool.Get(), spaced: spaced, }} |
|
1
2
3
4
5
6
7
8
9
10
11
12
13
14
15
16
17
18
19
20
21
22
23
24
25
|
type Buffer struct { bs []byte pool Pool}type Pool struct { p *sync.Pool}func NewPool() Pool { return Pool{p: &sync.Pool{ New: func() interface{} { return &Buffer{bs: make([]byte, 0, _size)} }, }}}// 从Pool里拿一个Buffer,初始化里面的[]bytefunc (p Pool) Get() *Buffer { buf := p.p.Get().(*Buffer) buf.Reset() // 这里赋值pool为当前Pool,用于使用完Buffer后把Buffer后放回pool里,也就是下面的put函数 buf.pool = p return buf}func (p Pool) put(buf *Buffer) { p.p.Put(buf)} |
|
1
2
3
4
5
6
7
8
9
10
11
12
13
14
15
16
17
18
19
20
21
22
23
24
25
26
27
28
29
30
31
32
33
34
35
36
37
38
39
40
41
42
43
44
45
46
47
48
49
50
51
52
53
54
55
56
57
58
59
60
61
62
63
64
65
66
67
68
69
70
71
72
73
74
75
76
77
78
79
80
|
// 核心函数openSinksfunc (cfg Config) openSinks() (zapcore.WriteSyncer, zapcore.WriteSyncer, error) { sink, closeOut, err := Open(cfg.OutputPaths...) if err != nil { return nil, nil, err } errSink, _, err := Open(cfg.ErrorOutputPaths...) if err != nil { closeOut() return nil, nil, err } return sink, errSink, nil}func Open(paths ...string) (zapcore.WriteSyncer, func(), error) { writers, close, err := open(paths) if err != nil { return nil, nil, err } writer := CombineWriteSyncers(writers...) return writer, close, nil}func open(paths []string) ([]zapcore.WriteSyncer, func(), error) { writers := make([]zapcore.WriteSyncer, 0, len(paths)) closers := make([]io.Closer, 0, len(paths)) close := func() { for _, c := range closers { c.Close() } } var openErr error for _, path := range paths { // 核心函数newSink sink, err := newSink(path) if err != nil { openErr = multierr.Append(openErr, fmt.Errorf("couldn't open sink %q: %v", path, err)) continue } writers = append(writers, sink) closers = append(closers, sink) } if openErr != nil { close() return writers, nil, openErr } return writers, close, nil}// 这里也是plugin式写法,可以通过RegisterSink来自定义sink,比如自定义一个支持http协议的sink,在文章的尾部会实现一个自定义的sink_sinkFactories = map[string]func(*url.URL) (Sink, error){ schemeFile: newFileSink,}func newSink(rawURL string) (Sink, error) { // 通过rawURL判断初始化哪种sink,实际上zap只支持file,看上面的_sinkFactories u, err := url.Parse(rawURL) if err != nil { return nil, fmt.Errorf("can't parse %q as a URL: %v", rawURL, err) } // 如果url是类似于/var/abc.log这种的字符串,那么经过Parse后的u.Scheme就是"",然后会被赋值schemeFile // 如果url是类似于http://127.0.0.1:1234这种的字符串,那么经过Parse后的u.Scheme就是"http",不过zap本身不支持http,可以自定义一个支持http的sink if u.Scheme == "" { u.Scheme = schemeFile } _sinkMutex.RLock() factory, ok := _sinkFactories[u.Scheme] _sinkMutex.RUnlock() if !ok { return nil, &errSinkNotFound{u.Scheme} } return factory(u)}// 这里的sink实际上就是一个*Filefunc newFileSink(u *url.URL) (Sink, error) { // ... switch u.Path { case "stdout": return nopCloserSink{os.Stdout}, nil case "stderr": return nopCloserSink{os.Stderr}, nil } return os.OpenFile(u.Path, os.O_WRONLY|os.O_APPEND|os.O_CREATE, 0666)} |
|
1
2
3
4
5
6
7
8
9
10
11
12
13
14
15
16
17
18
19
20
21
|
// 核心函数NewCorefunc NewCore(enc Encoder, ws WriteSyncer, enab LevelEnabler) Core { return &ioCore{ LevelEnabler: enab, enc: enc, out: ws, }}// 核心函数Newfunc New(core zapcore.Core, options ...Option) *Logger { if core == nil { return NewNop() } log := &Logger{ core: core, errorOutput: zapcore.Lock(os.Stderr), addStack: zapcore.FatalLevel + 1, clock: zapcore.DefaultClock, } return log.WithOptions(options...)} |
到New这里,就完成了一个logger的初始化,核心的结构体就是Encoder、Sink和ioCore,逻辑还是比较简单易懂的
打一条Log
下面写一段简单的demo
|
1
2
|
l, _ := zap.NewProduction()l.Error("Message Content", zap.String("tagA", "tagAValue")) |
|
1
2
3
4
5
6
7
|
func (log *Logger) Error(msg string, fields ...Field) { // 核心函数 check if ce := log.check(ErrorLevel, msg); ce != nil { // 核心函数 Write ce.Write(fields...) }} |
|
1
2
3
4
5
6
7
8
9
10
11
12
13
14
15
16
17
18
19
20
21
22
23
24
25
|
// 核心函数check,实际逻辑就是检查了下Level要不要打log,顺便添加了调用栈和callerfunc (log *Logger) check(lvl zapcore.Level, msg string) *zapcore.CheckedEntry { // 跳过当前这个check函数以及调用check的Error/Info/Fatal等函数 const callerSkipOffset = 2 // 检查level if lvl < zapcore.DPanicLevel && !log.core.Enabled(lvl) { return nil } ent := zapcore.Entry{ LoggerName: log.name, Time: log.clock.Now(), Level: lvl, Message: msg, } // 核心函数 ioCore.Check ce := log.core.Check(ent, nil) willWrite := ce != nil // ... if !willWrite { return ce } // 添加stacktrace和caller相关 // ... return ce} |
|
1
2
3
4
5
6
7
8
9
10
11
12
13
14
15
16
|
// 实际就是把core添加到了CheckedEntry里,在后续的CheckedEntry.Write里会被调用func (c *ioCore) Check(ent Entry, ce *CheckedEntry) *CheckedEntry { if c.Enabled(ent.Level) { return ce.AddCore(ent, c) } return ce}func (ce *CheckedEntry) AddCore(ent Entry, core Core) *CheckedEntry { if ce == nil { // getCheckedEntry使用了sync.Pool ce = getCheckedEntry() ce.Entry = ent } ce.cores = append(ce.cores, core) return ce} |
|
1
2
3
4
5
6
7
8
9
10
11
12
13
14
15
16
17
18
19
20
21
22
23
24
25
26
27
28
29
30
31
32
33
34
35
36
37
|
// 核心函数 Writefunc (ce *CheckedEntry) Write(fields ...Field) { // ... var err error // 实际就是调用了Core.Write for i := range ce.cores { err = multierr.Append(err, ce.cores[i].Write(ce.Entry, fields)) } if err != nil && ce.ErrorOutput != nil { fmt.Fprintf(ce.ErrorOutput, "%v write error: %v\n", ce.Time, err) ce.ErrorOutput.Sync() } should, msg := ce.should, ce.Message // 把CheckedEntry放回到pool里 putCheckedEntry(ce) // ...}func (c *ioCore) Write(ent Entry, fields []Field) error { // 首先Encode,高性能的核心就在EncodeEntry里 buf, err := c.enc.EncodeEntry(ent, fields) if err != nil { return err } // 然后Write,out就是sink _, err = c.out.Write(buf.Bytes()) // 然后把buf放回到pool里 buf.Free() if err != nil { return err } if ent.Level > ErrorLevel { // Since we may be crashing the program, sync the output. Ignore Sync // errors, pending a clean solution to issue #370. c.Sync() } return nil} |
|
1
2
3
4
5
6
7
8
9
10
11
12
13
14
15
16
17
18
19
20
21
22
23
24
25
26
27
28
29
30
31
32
33
34
35
36
37
38
39
40
41
42
43
44
45
46
47
48
49
50
51
52
53
54
55
56
57
58
59
60
61
62
63
64
65
66
67
68
69
|
// zap并没有使用类似marshalJson的方法来encode,而是使用了拼接字符串的方式手动拼出了一个json字符串,这种方式的性能比marshalJson的性能要好很多// 里面的具体逻辑很简单,就是append一个key,append一个valuefunc (enc *jsonEncoder) EncodeEntry(ent Entry, fields []Field) (*buffer.Buffer, error) { final := enc.clone() final.buf.AppendByte('{') if final.LevelKey != "" && final.EncodeLevel != nil { final.addKey(final.LevelKey) cur := final.buf.Len() final.EncodeLevel(ent.Level, final) if cur == final.buf.Len() { // User-supplied EncodeLevel was a no-op. Fall back to strings to keep // output JSON valid. final.AppendString(ent.Level.String()) } } if final.TimeKey != "" { final.AddTime(final.TimeKey, ent.Time) } if ent.LoggerName != "" && final.NameKey != "" { final.addKey(final.NameKey) cur := final.buf.Len() nameEncoder := final.EncodeName // if no name encoder provided, fall back to FullNameEncoder for backwards // compatibility if nameEncoder == nil { nameEncoder = FullNameEncoder } nameEncoder(ent.LoggerName, final) if cur == final.buf.Len() { // User-supplied EncodeName was a no-op. Fall back to strings to // keep output JSON valid. final.AppendString(ent.LoggerName) } } if ent.Caller.Defined { if final.CallerKey != "" { final.addKey(final.CallerKey) cur := final.buf.Len() final.EncodeCaller(ent.Caller, final) if cur == final.buf.Len() { // User-supplied EncodeCaller was a no-op. Fall back to strings to // keep output JSON valid. final.AppendString(ent.Caller.String()) } } if final.FunctionKey != "" { final.addKey(final.FunctionKey) final.AppendString(ent.Caller.Function) } } if final.MessageKey != "" { final.addKey(enc.MessageKey) final.AppendString(ent.Message) } if enc.buf.Len() > 0 { final.addElementSeparator() final.buf.Write(enc.buf.Bytes()) } addFields(final, fields) final.closeOpenNamespaces() if ent.Stack != "" && final.StacktraceKey != "" { final.AddString(final.StacktraceKey, ent.Stack) } final.buf.AppendByte('}') final.buf.AppendString(final.LineEnding) ret := final.buf putJSONEncoder(final) return ret, nil} |
encode完之后就是Write了,实际调用的就是Sink.Write,如果log是写到文件里的,那么调用的就是File.Write,至此一条日志记录完成
小结
zap记录一条日志的流程可以概括为3步
- check
- encode
- write
zap在性能优化方面有一些值得借鉴的地方
- 多处使用sync.Pool和bytes.Buffer优化GC
- 使用了自实现的jsonEncoder,简化了encode逻辑
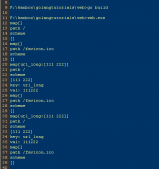
不过zap的log抑制,也就是sampler实现有些过于简单,可能会出现log丢失的问题,下面的代码可以完美复现这个问题
|
1
2
3
4
5
6
7
8
|
lc := zap.NewProductionConfig()lc.Encoding = "console"lc.Sampling.Initial = 1 // 当Initial为1时,第二条日志不会打印出来,改为大于1时第二条日志才会打印出来lc.Sampling.Thereafter = 10l, _ := lc.Build()l.Info("abc")l.Info("yTI")l.Info("def") |
增强zap
自定义sink
在阅读源码部分已经提到了zap只支持log写到文件里,一般业务日志都会统一收集到日志中心,那么就需要自定义一个sink,通过网络发送到某个地方统一收集起来,下面写一个简单的http协议的sink。
|
1
2
3
4
5
6
7
8
9
10
11
12
13
14
15
16
17
18
19
20
21
22
23
24
25
26
27
28
29
30
31
32
33
34
35
36
37
38
39
40
41
42
43
44
45
46
47
48
|
func init() { // 这里注册http sink err := zap.RegisterSink("http", httpSink) if err != nil { fmt.Println("Register http sink fail", err) }}func httpSink(url *url.URL) (zap.Sink, error) { return &Http{ // httpc是我封装的httpClient,没什么别的逻辑,直接当成http.Client就好 httpc: httpc.New(httpc.NewConfig(), context.Background()), url: url, }, nil}type Http struct { httpc *httpc.HttpC url *url.URL}// 主要逻辑就是Writefunc (h *Http) Write(p []byte) (n int, err error) { // 初始化request req, err := http.NewRequest("POST", h.url.String(), bytes.NewReader(p)) if err != nil { return 0, err } // 执行http请求 resp, err := h.httpc.Do(req) if err != nil { return 0, err } defer resp.Body.Close() // 获取response respBody, err := ioutil.ReadAll(resp.Body) if err != nil { return 0, err } if resp.StatusCode != http.StatusNoContent && resp.StatusCode != http.StatusOK { return 0, errors.New(util.Bytes2String(respBody)) } return len(p), nil}// 可以搞个内置的queue或者[]log,在Sync函数里用来做批量发送提升性能,这里只是简单的实现,所以Sync没什么逻辑func (h *Http) Sync() error { return nil}func (h *Http) Close() error { return h.httpc.Close()} |
写完sink后,只需要在Config里的outputPaths里添加一条"http://xxx:xxx" ,所有的log就会走到自定义的sink逻辑,通过http发送出去。
来点骚操作,在源码阅读部分,可以看到zap是把url.Parse后的scheme当作sink名称的,例如在Config里的outputPaths里添加一条"wtf://xxx:xxx",zap就会去寻找名称为wtf的sink,我们把上面的http sink的zap.RegisterSink("http", httpSink)改为zap.RegisterSink("wtf", httpSink),然后在Write函数的逻辑里把"wtf://"后面的内容拼成一个完整的http url,同样可以运行,操作是不是很骚。
error调用栈
当使用zap打Error日志时,如果配置了addStack,那么zap会自动把调用栈写到log里,下面是一个例子
|
1
2
3
4
5
6
7
8
9
10
11
12
13
14
15
16
17
18
|
package mainimport ( "go.uber.org/zap")var l *zap.Loggerfunc test_a() { test_b()}func test_b() { test_c()}func test_c() { l.Error("err content")}func main() { l, _ = zap.NewDevelopment() test_a()} |
这是log内容,当使用jsonEncoder时,调用栈会在stacktrace字段里,下面是console格式的
|
1
2
3
4
5
6
7
8
9
10
11
|
2022-05-23T23:16:36.598+0800 ERROR gtil/main.go:20 err contentmain.test_c D:/workspace/code/go/gtil/main.go:20main.test_b D:/workspace/code/go/gtil/main.go:16main.test_a D:/workspace/code/go/gtil/main.go:12main.main D:/workspace/code/go/gtil/main.go:25runtime.main D:/workspace/env/scoop/apps/go/current/src/runtime/proc.go:250 |
这么一看好像很完美,有error日志了还可以看到调用栈,但是我们一般打log时,总是会在最上层打log,而不是每一层都打log,拿上面的代码举例子
|
1
2
3
4
5
6
7
8
9
10
11
12
13
14
15
16
17
|
func test_a() error { return test_b()}func test_b() error { return test_c()}func test_c() error { // 底层的函数出现error应该return,而不是打log return errors.new("do test_c fail")}func main() { l, _ = zap.NewProduction() err := test_a() if err != nil { l.Error("main error", zap.Error(err)) }} |
下面是log内容
|
1
2
3
4
5
|
2022-05-23T23:16:54.955+0800 ERROR gtil/main.go:27 main error {"error": "do test_c fail"}main.main D:/workspace/code/go/gtil/main.go:27runtime.main D:/workspace/env/scoop/apps/go/current/src/runtime/proc.go:250 |
这就出现了几个问题,1. 调用栈只到了main,没有更底层的, 2. 如果test_b接受到test_c的error时,想加上一些自己的error content返回出去,这两个问题就体现出了golang在错误处理方面的不足,不过有一个库可以解决这两个问题,github.com/pkg/errors ,这个库自定义了error,可以在error里添加调用栈或额外的信息,下面写个demo
|
1
2
3
4
5
6
7
8
9
10
11
12
13
14
15
16
17
18
19
20
21
22
23
24
|
func test_a() error { err := test_b() if err != nil { return errors.Wrap(err, "do test_a fail") } return nil}func test_b() error { err := test_c() if err != nil { return errors.Wrap(err, "do test_b fail") } return nil}func test_c() error { return errors.New("do test_c fail")}func main() { l, _ = zap.NewDevelopment() err := test_a() if err != nil { l.Error("main error", zap.Error(err)) }} |
下面是输出内容,可以看到在errorVerbose字段里每一个函数的error都返回了出来,并带上了调用栈,不过error字段有点乱七八糟,并且还显示了zap自带的调用栈
2022-05-23T23:34:13.339+0800 ERROR gtil/main.go:34 main error {"error": "do test_a fail: do test_b fail: do test_c fail", "errorVerbose": "do test_c fail\nmain.test_c\n\tD:/workspace/code/go/gtil/main.go:27\nmain.test_b\n\tD:/workspace/code/go/gtil/main.go:19\nmain.test_a\n\tD:/workspace/code/go/gtil/main.go:11\nmain.main\n\tD:/workspace/code/go/gtil/main.go:32\nruntime.main\n\tD:/workspace/env/scoop/apps/go/current/src/runtime/proc.go:250\nruntime.goexit\n\tD:/workspace/env/scoop/apps/go/current/src/runtime/asm_amd64.s:1571\ndo test_b fail\nmain.test_b\n\tD:/workspace/code/go/gtil/main.go:21\nmain.test_a\n\tD:/workspace/code/go/gtil/main.go:11\nmain.main\n\tD:/workspace/code/go/gtil/main.go:32\nruntime.main\n\tD:/workspace/env/scoop/apps/go/current/src/runtime/proc.go:250\nruntime.goexit\n\tD:/workspace/env/scoop/apps/go/current/src/runtime/asm_amd64.s:1571\ndo test_a fail\nmain.test_a\n\tD:/workspace/code/go/gtil/main.go:13\nmain.main\n\tD:/workspace/code/go/gtil/main.go:32\nruntime.main\n\tD:/workspace/env/scoop/apps/go/current/src/runtime/proc.go:250\nruntime.goexit\n\tD:/workspace/env/scoop/apps/go/current/src/runtime/asm_amd64.s:1571"}
main.main
D:/workspace/code/go/gtil/main.go:34
runtime.main
D:/workspace/env/scoop/apps/go/current/src/runtime/proc.go:250
要做的就是去掉自带的调用栈,把error字段搞地好看点,只需要自定义一个Core就可以,下面贴出代码
|
1
2
3
4
5
6
7
8
9
10
11
12
13
14
15
16
17
18
19
20
21
22
23
|
func NewErrStackCore(c zapcore.Core) zapcore.Core { return &errStackCore{c}}type errStackCore struct { zapcore.Core}func (c *errStackCore) With(fields []zapcore.Field) zapcore.Core { return &errStackCore{ c.Core.With(fields), }}func (c *errStackCore) Write(ent zapcore.Entry, fields []zapcore.Field) error { // 判断fields里有没有error字段 if !hasStackedErr(fields) { return c.Core.Write(ent, fields) } // 这里是重点,从fields里取出error字段,把内容放到ent.Stack里,逻辑就是这样,具体代码就不给出了 ent.Stack, fields = getStacks(fields) return c.Core.Write(ent, fields)}func (c *errStackCore) Check(ent zapcore.Entry, ce *zapcore.CheckedEntry) *zapcore.CheckedEntry { return c.Core.Check(ent, ce)} |
以上就是Go日志框架zap增强及源码解读的详细内容,更多关于Go日志框架zap增强的资料请关注服务器之家其它相关文章!
原文链接:https://juejin.cn/post/7125012224623509540
")

")