通过普通摄像头拍摄出的照片来进行识别是存在很大的困难的,但是有困难才能找到更好的方法去解决。在百度上大致找了一下手语识别的案例,很少。api只是看到了face++发布的手势识别,在我写文章的时候又看到了百度发布的手势识别api,之后会尝试去进行使用。
这次使用的是face++的api,face++的api是在之前发现的,功能上的话还是比较强大的,但是没有离线版本,需要将数据进行上传,然后对json进行解析得到结果。
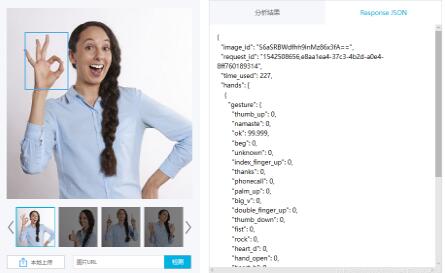
这是官网给出的一个demo,识别率挺不错的,最后给出的是一个在20种手势上的分布概率,接下来我们自己调用一下api分析自己的手势。
1. 查看官方的api。找到gesture api,先看一下是怎么说的。
调用参数:
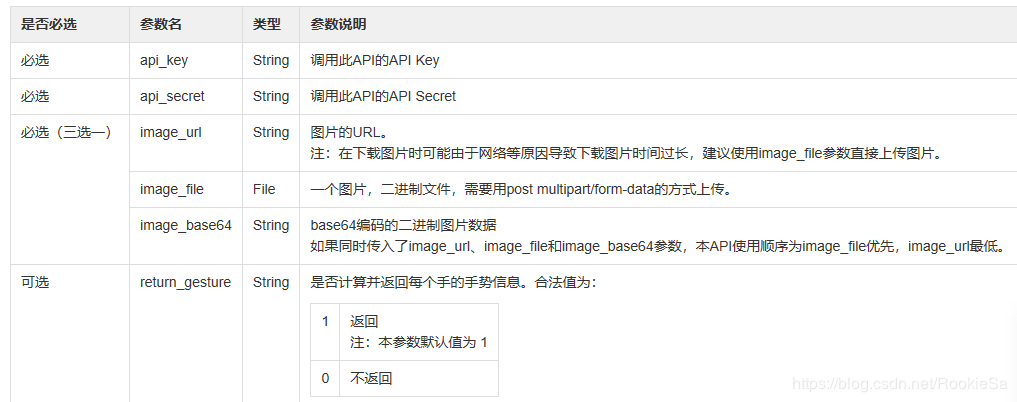
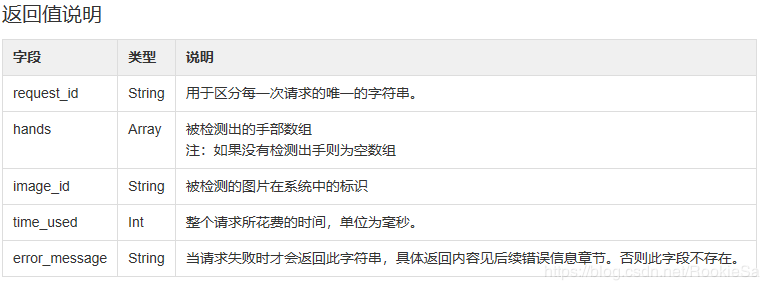
官方还给出了一些调用错误返回的参数的说明,有兴趣的可以去官网看一下。
还给出了一个使用命令行调用api的实例:

从实例上不难看出,向 https://api-cn.faceplusplus.com/humanbodypp/beta/gesture 发送请求,默认的参数有 api_key,api_secret,image_file。api_key和api_secret可以通过控制台进行生成。
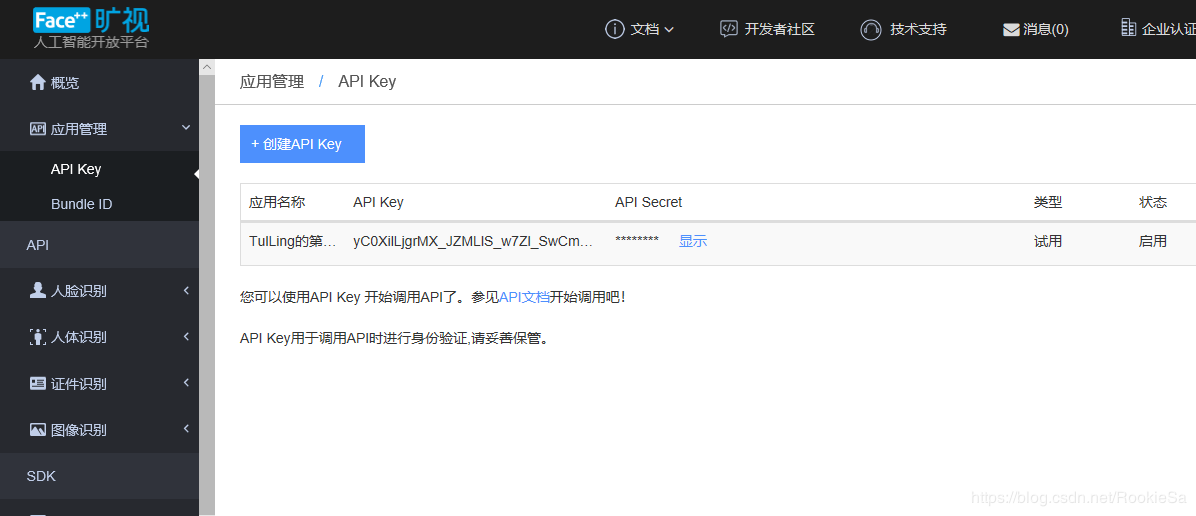
接下来开始写代码的调用,python版本的,其他版本的类似。
我们将api封装成一个类 gesture:
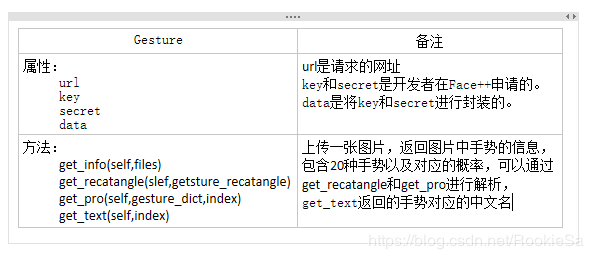
将其中的key和secret替换成自己的就可以使用:
|
1
2
3
4
5
6
7
8
9
10
11
12
13
14
15
16
17
18
19
20
21
22
23
24
25
26
27
28
29
30
31
32
33
34
35
36
37
38
39
40
41
42
43
44
45
46
47
48
49
50
51
52
53
54
55
56
57
58
59
60
61
62
63
64
65
66
67
68
69
70
71
72
|
'''# -*- coding:utf-8 -*-@author: tulling'''import requests from json import jsondecoder gesture_englist = ['big_v','fist','double_finger_up','hand_open','heart_d','index_finger_up','ok','phonecall','palm_up','rock','thumb_down','thumb_up','victory']gesture_chinese = ["我最帅", "拳头,停下", "我发誓", "数字5", "比心", "数字1", "好的呢,ok", "打电话", "手心向上", "爱你,520", "差评,不好的", "好评,good,很棒", "胜利,开心"]# 将字典排序def sort_dict(adict): return sorted(adict.items(),key= lambda item:item[1]) class gesture(object): def __init__(self): self.http_url = 'https://api-cn.faceplusplus.com/humanbodypp/beta/gesture' self.key = '*****' self.secret = '******' self.data = {"api_key":self.key,"api_secret":self.secret} # 获取手势信息 def get_info(self,files): response = requests.post(self.http_url,data=self.data,files=files) req_con = response.content.decode('utf-8') req_dict = jsondecoder().decode(req_con) #print(req_dict) if('error_message' not in req_dict.keys()) and (len(req_dict['hands'])): # 获取 hands_dict = req_dict['hands'] #print(type(hands_dict)) # 获取到手的矩形的字典 gesture_rectangle_dict = hands_dict[0]['hand_rectangle'] # 获取到手势的字典 gesture_dict = hands_dict[0]['gesture'] return gesture_dict,gesture_rectangle_dict else: return [],[]; # 获取到手势文本信息 def get_text(self,index): return gesture_chinese[index] # 获取到手势对应的概率 def get_pro(self,gesture_dict,index): # print(gesture_dict) if(gesture_dict is none or gesture_dict == []): return 0 return gesture_dict[gesture_englist[index]] # 获取到手势的位置 def get_rectangle(self,gesture_rectangle_dict): if(gesture_rectangle_dict is none or gesture_rectangle_dict == []): return (0,0,0,0) x = gesture_rectangle_dict['top'] y = gesture_rectangle_dict['left'] width = gesture_rectangle_dict['width'] height = gesture_rectangle_dict['height'] return (x,y,width,height) |
封装好了gesture类后接下来就是调用:先将官方给出的手势的图片保存起来,为了方便只保留单手的手势,然后生成随机数读取手势图片,我们去模仿手势,后台显示是正确手势的概率以及具体的位置,如果图像中没有手势则概率为0,位置为(0,0,0,0)。
|
1
2
3
4
5
6
7
8
9
10
11
12
13
14
15
16
17
18
19
20
21
22
23
24
25
26
27
28
29
30
31
32
33
34
35
36
37
38
39
40
41
42
43
44
45
46
47
48
49
50
51
52
53
54
55
56
57
58
59
60
61
62
63
64
65
|
'''# -*- coding:utf-8 -*-@author: tulling'''import syssys.path.append("../gesture/") import osimport randomimport cv2 as cvimport timeimport learngesture def gesturelearning(): os.system("cls") print("进入学习手势模式!") print("我们有13个手势,来和我学吧!(每次结束后可以选择输入 q\q 退出!)") while(true): pic_num = random.randint(0,12) # 生成显示的图片的编号(随机数: 0 - 13) print(pic_num) pic_path = '../gesture/pic/gesture' + str(pic_num) + ".jpg" # 生成图片路径 pic = cv.imread(pic_path) # 加载图片 pic = cv.resize(pic,(120,120)) cv.imshow("pic",pic) # 显示要学习的手势 print("即将打开摄像头,你有5秒种的时间准备手势,5秒种保持手势!") write_path = "../gesture/pic/test.jpg" cap = cv.videocapture(1) while(true): _,frame = cap.read() cv.imshow("frame",frame) key = cv.waitkey(10) if(key == ord('q') or key == ord('q')): cv.imwrite(write_path,frame) cv.waitkey(200) cap.release() cv.destroyallwindows() break # 此处应该有手势识别 files = {"image_file":open(write_path,'rb')} gesture = learngesture.gesture() # 获取到手势文本 ge_text = gesture.get_text(pic_num) # 获取手势信息 gesture_dict,gesture_rectangle_dict = gesture.get_info(files) # 获取手势的概率 ge_pro = gesture.get_pro(gesture_dict,pic_num) # 获取到手势的坐标 ge_rect = gesture.get_rectangle(gesture_rectangle_dict) print("您学习的手势是:",ge_text) print("相似度达到:",ge_pro) print("具体位置:",ge_rect) # print("一轮学习结束,是否继续学习?(y/n)") # 退出程序,回到主菜单或者继续 commend = input("一轮学习结束,是否继续学习?(y/n):") print(commend) if( commend == 'n' or commend == "n"): breakgesturelearning() |
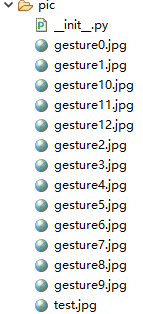
图片保存的路径:./pic/
运行结果:
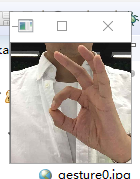
显示的随机手势
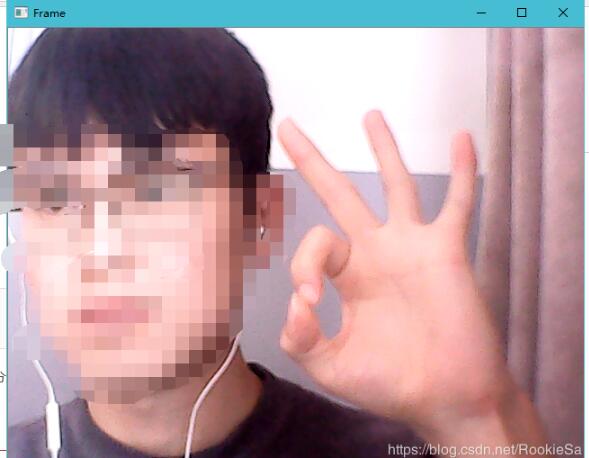
模仿的手势(打个码,主要看手)
点击q后:

手势做的有点不标准,但是没关系,系统可以运行。
调用face++api的文章到此结束。代码打包后会上传。之后会修改链接地址。
以上就是本文的全部内容,希望对大家的学习有所帮助,也希望大家多多支持服务器之家。
原文链接:https://blog.csdn.net/RookieSa/article/details/84196341


