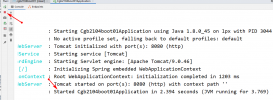
这是主要使用到的jar 文件是:spring mvc +apache common-fileuplad
第一步:web.xml 文件。【重点是spring mvc的拦截器和相关监听器】
|
1
2
3
4
5
6
7
8
9
10
11
12
13
14
15
16
17
18
19
20
21
22
23
24
25
26
27
28
29
30
31
32
33
34
35
36
37
38
39
40
41
42
43
44
45
46
47
48
49
50
51
52
53
|
<?xml version="1.0" encoding="UTF-8"?> <web-app version="2.5" xmlns="http://java.sun.com/xml/ns/javaee" xmlns:xsi="http://www.w3.org/2001/XMLSchema-instance" xsi:schemaLocation="http://java.sun.com/xml/ns/javaee http://java.sun.com/xml/ns/javaee/web-app_2_5.xsd"> <display-name></display-name> <!-- Spring和mybatis的配置文件 --> <context-param> <param-name>contextConfigLocation</param-name> <param-value>classpath:spring-mybatis.xml</param-value> </context-param> <!-- 编码过滤器 --> <filter> <filter-name>encodingFilter</filter-name> <filter-class>org.springframework.web.filter.CharacterEncodingFilter</filter-class> <init-param> <param-name>encoding</param-name> <param-value>UTF-8</param-value> </init-param> </filter> <filter-mapping> <filter-name>encodingFilter</filter-name> <url-pattern>/*</url-pattern> </filter-mapping> <!-- Spring监听器 --> <listener> <listener-class>org.springframework.web.context.ContextLoaderListener</listener-class> </listener> <!-- 防止Spring内存溢出监听器 --> <listener> <listener-class>org.springframework.web.util.IntrospectorCleanupListener</listener-class> </listener> <!-- Spring MVC servlet --> <servlet> <servlet-name>SpringMVC</servlet-name> <servlet-class>org.springframework.web.servlet.DispatcherServlet</servlet-class> <init-param> <param-name>contextConfigLocation</param-name> <param-value>classpath:spring-mvc.xml</param-value> </init-param> <load-on-startup>1</load-on-startup> </servlet> <servlet-mapping> <servlet-name>SpringMVC</servlet-name> <!-- 此处可以可以配置成*.do,对应struts的后缀习惯 --> <url-pattern>/</url-pattern> </servlet-mapping> <welcome-file-list> <welcome-file>/index.jsp</welcome-file> </welcome-file-list> </web-app> |
第二步:spring-mvc 配置文件【重点:spring mvc 视图模式,spring mvc 文件上传限定参数,spring mvc 资源拦截管理和其他】
|
1
2
3
4
5
6
7
8
9
10
11
12
13
14
15
16
17
18
19
20
21
22
23
24
25
26
27
28
29
30
31
32
33
34
35
36
37
38
39
40
41
42
43
44
45
46
47
48
49
50
51
52
53
54
55
56
57
58
59
|
<?xml version="1.0" encoding="UTF-8"?> <beans xmlns="http://www.springframework.org/schema/beans" xmlns:xsi="http://www.w3.org/2001/XMLSchema-instance" xmlns:p="http://www.springframework.org/schema/p" xmlns:context="http://www.springframework.org/schema/context" xmlns:mvc="http://www.springframework.org/schema/mvc" xsi:schemaLocation="http://www.springframework.org/schema/beans http://www.springframework.org/schema/beans/spring-beans-3.1.xsd http://www.springframework.org/schema/context http://www.springframework.org/schema/context/spring-context-3.1.xsd http://www.springframework.org/schema/mvc http://www.springframework.org/schema/mvc/spring-mvc-4.0.xsd"> <!-- 自动扫描该包,使SpringMVC认为包下用了@controller注解的类是控制器 --> <mvc:annotation-driven /> <mvc:default-servlet-handler/> <context:annotation-config/> <context:component-scan base-package="com" /> <!--避免IE执行AJAX时,返回JSON出现下载文件 --> <bean id="mappingJacksonHttpMessageConverter" class="org.springframework.http.converter.json.MappingJacksonHttpMessageConverter"> <property name="supportedMediaTypes"> <list> <value>text/html;charset=UTF-8</value> </list> </property> </bean> <!-- 启动SpringMVC的注解功能,完成请求和注解POJO的映射 --> <bean class="org.springframework.web.servlet.mvc.annotation.AnnotationMethodHandlerAdapter"> <property name="messageConverters"> <list> <ref bean="mappingJacksonHttpMessageConverter" /> <!-- JSON转换器 --> </list> </property> </bean> <!-- 定义跳转的文件的前后缀 ,视图模式配置--> <bean class="org.springframework.web.servlet.view.InternalResourceViewResolver"> <!-- 这里的配置我的理解是自动给后面action的方法return的字符串加上前缀和后缀,变成一个 可用的url地址 --> <property name="prefix" value="/backstage/jsp/" /> <property name="suffix" value=".jsp" /> </bean> <!-- 配置文件上传,如果没有使用文件上传可以不用配置,当然如果不配,那么配置文件中也不必引入上传组件包 --> <bean id="multipartResolver" class="org.springframework.web.multipart.commons.CommonsMultipartResolver"> <!-- 默认编码 --> <property name="defaultEncoding" value="utf-8" /> <!-- 文件大小最大值 --> <property name="maxUploadSize" value="10485760000" /> <!-- 内存中的最大值 --> <property name="maxInMemorySize" value="40960" /> </bean> <!-- 声明DispatcherServlet不要拦截下面声明的目录 --> <mvc:resources location="/js/" mapping="/js/**" /> <mvc:resources location="/images/" mapping="/images/**"/> <mvc:resources location="/css/" mapping="/css/**"/> <mvc:resources location="/common/" mapping="/common/**"/> </beans> |
第三步:jsp 页面
|
1
2
3
4
5
6
7
8
9
|
<%@ page language="java" pageEncoding="UTF-8"%> <form action="<%=request.getContextPath()%>/users/add" method="POST" enctype="multipart/form-data"> username: <input type="text" name="username"/><br/> nickname: <input type="text" name="nickname"/><br/> password: <input type="password" name="password"/><br/> yourmail: <input type="text" name="email"/><br/> yourfile: <input type="file" name="myfiles"/><br/> <input type="submit" value="添加新用户"/> </form> |
第四步:spring mvc 控制器代码
|
1
2
3
4
5
6
7
8
9
10
11
12
13
14
15
16
17
18
19
20
21
22
23
24
25
26
27
28
29
30
31
32
33
34
35
36
37
38
39
40
41
42
43
44
45
46
47
48
49
50
51
52
53
54
55
56
57
58
59
60
61
62
63
64
65
66
67
68
69
70
71
72
73
74
75
76
77
78
79
80
81
82
83
84
85
86
87
88
89
90
91
92
93
94
95
96
97
98
99
100
101
102
103
104
105
106
107
108
109
110
111
112
113
114
|
package com.wlsq.controller; import java.io.File; import java.io.IOException; import java.util.HashMap; import java.util.List; import java.util.Map; import javax.servlet.http.HttpServletRequest; import javax.servlet.http.HttpServletResponse; import org.apache.commons.io.FileUtils; import org.springframework.beans.factory.annotation.Autowired; import org.springframework.stereotype.Controller; import org.springframework.web.bind.annotation.RequestMapping; import org.springframework.web.bind.annotation.RequestMethod; import org.springframework.web.bind.annotation.RequestParam; import org.springframework.web.multipart.MultipartFile; import org.springframework.web.servlet.ModelAndView; import com.wlsq.model.News; import com.wlsq.service.IUserMapperService; import com.wlsq.util.Pagination; @Controller@RequestMapping(value="/users") public class UserController { @Autowired private IUserMapperService userService; @RequestMapping(value="/userAll") public ModelAndView searchNews(HttpServletRequest request,HttpServletResponse response){ ModelAndView mv = null; try{ mv = new ModelAndView(); int pageSize = Integer .parseInt(request.getParameter("pageSize") == null ? "10" : request.getParameter("pageSize")); int pageNum = Integer .parseInt(request.getParameter("pageNum") == null ? "1" : request.getParameter("pageNum")); Map<String, Object> maps = new HashMap<>(); maps.put("pageSize", pageSize); maps.put("pageNum", (pageNum-1) * pageSize); List<News> list =userService.selectAllUsers(maps); int count = userService.selectCountUsers(); Pagination page = new Pagination(count); page.setCurrentPage(pageNum); mv.addObject("pnums", page.getPageNumList()); mv.addObject("currentPage", pageNum); mv.addObject("pnext_flag", page.nextEnable()); mv.addObject("plast_flag", page.lastEnable()); page.lastPage(); mv.addObject("last_page", page.getCurrentPage()); mv.addObject("count", count); mv.addObject("pageCount", page.getPages()); if(list !=null && list.size()>0){ //用户存在 mv.addObject("partners", list); //设置逻辑视图名,视图解析器会根据该名字解析到具体的视图页面 mv.setViewName("/users/users"); }else{ //用户存在 mv.addObject("partners", list); //设置逻辑视图名,视图解析器会根据该名字解析到具体的视图页面 mv.setViewName("/users/users"); } }catch(Exception e){ //设置逻辑视图名,视图解析器会根据该名字解析到具体的视图页面 mv.setViewName("/users/users"); } return mv; } @RequestMapping(value="/add", method=RequestMethod.POST) public String addUser(@RequestParam MultipartFile[] myfiles, HttpServletRequest request) throws IOException{ String username = request.getParameter("username"); String nickname = request.getParameter("nickname"); String password = request.getParameter("password"); String email = request.getParameter("email"); System.out.println("name:"+username); System.out.println("nickname:"+nickname); System.out.println("password:"+password); System.out.println("email:"+email); //如果只是上传一个文件,则只需要MultipartFile类型接收文件即可,而且无需显式指定@RequestParam注解 //如果想上传多个文件,那么 这里就要用MultipartFile[]类型来接收文件,并且还要指定@RequestParam注解 //并且上传多个文件时,前台表单中的所有<input type="file"/>的name都应该是myfiles,否则参数里的myfiles无法获取到所有上传的文件 for(MultipartFile myfile : myfiles){ if(myfile.isEmpty()){ System.out.println("文件未上传"); }else{ System.out.println("文件长度: " + myfile.getSize()); System.out.println("文件类型: " + myfile.getContentType()); System.out.println("文件名称: " + myfile.getName()); System.out.println("文件原名: " + myfile.getOriginalFilename()); System.out.println("========================================"); //如果用的是Tomcat服务器,则文件会上传到\\%TOMCAT_HOME%\\webapps\\YourWebProject\\WEB-INF\\upload\\文件夹中 String realPath = request.getSession().getServletContext().getRealPath("/WEB-INF/upload"); //这里不必处理IO流关闭的问题,因为FileUtils.copyInputStreamToFile()方法内部会自动把用到的IO流关掉,我是看它的源码才知道的 FileUtils.copyInputStreamToFile(myfile.getInputStream(), new File(realPath, myfile.getOriginalFilename())); } } return "../../index"; } } |
记得在WEB-INFO建立存放上传文件目录(upload)
以上就是本文的全部内容,希望对大家的学习有所帮助,也希望大家多多支持服务器之家。
原文链接:http://blog.csdn.net/zhouzhiwengang/article/details/51055012?locationNum=14&fps=1


